Cotton webbing for tote bag handles
Handle drop and seam position determine how a tote carries. Mock up the full handle loop, then check grip comfort and fabric distortion after sewing and washing.
Content updated

In this guide
Key choices for your project
Approve handle drop as an assembled dimension, not simply the cut length. The amount buried in the bag and the seam layout change the usable opening. Check a pair together for equal length and for twisting after the bag is washed.
- Finished handle drop
- Insertion depth into the bag
- Pair length after washing
Spread handle force through the bag attachment
Map the stitch lines, reinforcement and fabric grain around the handle end. A wider tape does not help if its effective attachment is concentrated into a narrow or poorly supported area. Build the full bag-wall stack and inspect distortion around the outermost stitches while the sample is held under the buyer’s agreed evaluation load.
- Reinforcement extends beyond the outer stitch lines
- Bag-wall distortion around each handle end
A handle opening measured flat can close around a filled tote
Imagine a tote whose paired handles have equal drop on the cutting table. With a wide box inside, the bag walls pull outward and the handle roots move apart. The opening becomes tight over a jacket; carrying by hand instead brings the loaded base too close to the ground. Making both handles longer solves one position but changes the other.
Define the intended hand and shoulder configurations with representative contents. Mark all four attachment datums and measure the complete loops on the filled bag, including the top-edge shape. Compare grip, clearance, access and fabric response before freezing the cut schedule; repeat after the stated care and recovery sequence.
Approve a paired handle layout against the filled tote and intended carrying positions, with attachment datums, usable openings and care state recorded.
Products to start with
Open a product to see its listed specification. Custom colours, dimensions and order terms are confirmed for your project.
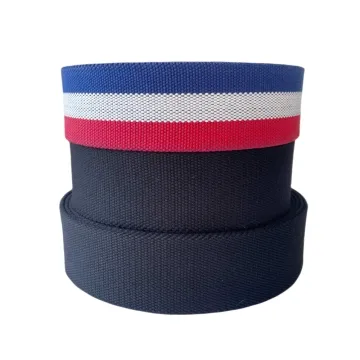
More product photos
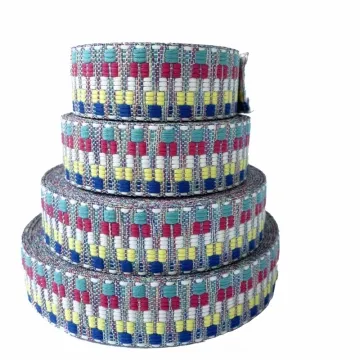
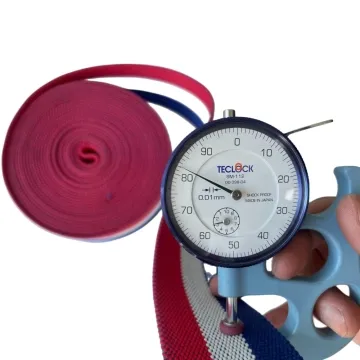
Prevent paired handles from being assembled with a twist
Mark the outward face and bag-side end immediately after cutting, then place both handles in a simple assembly layout before sewing. Compare the marks at all four attachment points. This catches a half-turn or reversed decorative face before the ends are buried, where correction would require opening the bag seam.
- Outward-face mark visible on both cut handles
- Four attachment points aligned before sewing
Create a tote handle geometry and carrying record
Connect the handle dimensions to the bag shape, contents and carrying configuration.
Swipe to see all columns ↔
| Field | What to record | How to confirm |
|---|---|---|
| Bag reference | Bag size, wall stack, top closure, representative contents and filled profile | Prepare an identified filled prototype |
| Attachment datums | Four root positions, spacing, insertion depth and reference stitch line | Mark the complete bag drawing |
| Handle geometry | Cut length, finished loop, drop, grip span, face and pair orientation | Measure from named datums |
| Grip construction | Tape width, thickness, edge, fold, cover and seam location | Build the complete contact section |
| Carrying states | Hand or shoulder use, clothing, clearance, access and care/recovery condition | Operate the same filled bag |
| Approval evidence | Dimensions, pressure points, top-edge distortion, pair balance and retained sample | Compare marked before-and-after records |
The buyer defines contents, carrying loads and acceptance. Geometry approval does not establish the strength of the complete bag.
Download specification worksheet ↓Fit the handles to the filled bag
Define the carrying configurations
Choose representative contents and state whether the tote must work by hand, over a shoulder or in both positions, including intended clothing.
Mark roots and measure loops
Locate all four attachment datums and record loop dimensions with the bag filled; include the changed top edge rather than a flat outline.
Build and carry the pair
Sew production layers and complete grip sections, then compare clearance, access, pressure points and bag-wall distortion in every required carrying configuration.
Repeat care and freeze dimensions
Apply the stated care and recovery sequence, remeasure from the same datums and retain the complete tote with its approved cut and attachment schedule.
Handle decisions that miss the carrying geometry
Approve the empty bag only
Contents change the wall shape and handle-root spacing. Check the intended fill before accepting opening size, clearance and access.
Lengthen handles without checking both positions
Extra length can improve shoulder access while reducing hand-carry clearance. Compare every intended position on the same loaded prototype.
Measure drop from an undefined edge
A curved or gathered top edge changes the reference. Name the attachment datums and measurement state so the next sample is comparable.
Questions before you choose
How thick should cotton webbing be for tote bag handles?
Choose thickness with the bag weight, handle width and sewing machine in mind. A thick handle can feel substantial but create bulky folds and difficult seam penetration. Sew it to the actual canvas, load the bag and inspect grip, puckering and attachment distortion.
How can I stop tote bag handles from stretching or twisting after washing?
Pre-test the exact webbing and bag fabric together using the intended care cycle. Measure handle length, spacing and twist before and after. Keep grain direction and attachment sewing consistent, and approve the joined prototype rather than separate fabric and handle swatches.
Tell us what you are making
You can enquire before every detail is settled. Tell us the intended use and what you need help choosing; add dimensions or quantities if you know them.
What happens after your enquiry
We review the intended use and open specification questions first. Sample options, costs, minimum quantities and timing can then be discussed against that brief. Sending an enquiry does not place an order.
Request a relevant sample →