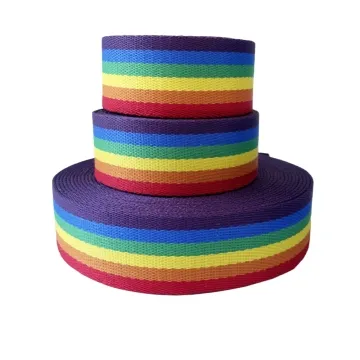
Custom webbing for shoulder bag straps
The strap touches clothing, skin and moving hardware. Test the chosen width across the shoulder and inspect where the adjuster bends the visible pattern.
Content updated

In this guide
Key choices for your project
Map the contact area over the shoulder and the length that passes through the adjuster. A decorative face can suit the visible span while creating too much thickness at a folded end. Trial the strap with the intended bag load and clothing fabric.
- Contact width over the shoulder
- Folded end thickness
- Surface against clothing
Set the strap exit angle at each bag attachment
Load the bag mock-up and observe how the tape leaves each ring, tab or sewn anchor. If the strap exits at an angle, one edge may carry more contact or the visible face may rotate toward the body. Adjust attachment orientation on the bag pattern before changing the webbing width or stiffness.
- Edge contact where the strap leaves each attachment
- Visible-face orientation with the bag loaded
A shoulder strap can look correct on the table and feel wrong on the bag
Imagine a decorative strap that lies flat beside the approved bag body. On the loaded sample, the adjuster places a double layer near the shoulder, the edge turns toward clothing, and a large motif disappears inside the folded end. The same webbing slides smoothly through one buckle but bunches at the sewn transition where reinforcement adds thickness.
Map the shoulder contact span, adjustable range, visible face and every hardware turn on the complete bag. Use the intended bag load and representative clothing material to compare pressure distribution, edge feel, slip and rubbing. Check the shortest and longest settings, including folded ends and loose-tail control. Align the artwork only after the cut length, seam allowance and allowable motif interruption are fixed.
Specify shoulder-bag webbing as a complete strap route, combining contact width, adjustment geometry, finished joints, artwork placement and loaded handling.
Products to start with
Open a product to see its listed specification. Custom colours, dimensions and order terms are confirmed for your project.
More product photos
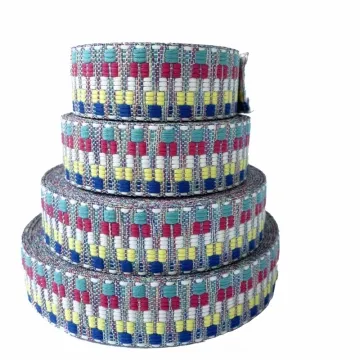
Place hardware across the usable adjustment range
Mark shortest, middle and longest wearing positions on a full strap. Check where the adjuster, join, logo and loose tail fall at each setting, including when the bag is worn over light and bulky clothing. Approve a range that keeps hard parts away from the main shoulder contact zone and leaves the tail managed.
- Hardware position at each marked wearing length
- Loose-tail control at the shortest setting
Record the complete shoulder-strap route
The schedule links the webbing to the bag, hardware, user-contact span and visible artwork at both adjustment limits.
Swipe to see all columns ↔
| Field | What to record | How to confirm |
|---|---|---|
| Webbing identity | Fibre, weave, width, thickness, finish, approved face, colour and sample code | Inspect approved finished sample |
| Length geometry | Measurement endpoints, shortest and longest settings, contact span, doubled region and loose tail | Measure complete adjusted bag |
| Hardware route | Adjuster, rings or hooks, slot dimensions, threading direction, turns and tail keeper | Build with production components |
| End attachments | Fold direction, cut treatment, layers, reinforcement, seam position, stitch and maximum thickness | Open one production-equivalent joint |
| Artwork placement | Repeat, approved face, orientation, visible zones, interruptions and permitted cut region | Overlay full-size strap layout |
| Handling check | Intended bag load, clothing contact, shoulder position, slip, edge feel, rubbing and recovery | Wear-test representative complete samples |
The buyer must define load, durability and product acceptance for the complete bag; material feel or buckle passage alone is insufficient.
Download specification worksheet ↓Develop the strap on the complete loaded bag
Map contact and adjustment
Draw the strap path at shortest and longest settings, marking shoulder span, doubled layers, hardware turns, loose tail and visible face.
Resolve joints and hardware
Build folds, reinforcement and seams with production components, then check passage, bunching and maximum thickness at every transition.
Place the artwork
Set repeat and orientation against actual cut ends, folds, stitch zones and visible spans, defining where a motif may be interrupted.
Evaluate loaded handling
Use the intended bag load and representative clothing to compare shoulder contact, edge feel, slip, rubbing and adjustment in motion.
Strap choices that ignore the assembled bag
Approving a loose webbing swatch
A swatch omits doubled layers, seams, reinforcement and hardware turns. Judge the complete strap at both adjustment limits.
Placing artwork before length is fixed
A centred motif can disappear inside a fold or buckle. Approve artwork on the final cut and assembly layout.
Checking comfort on an empty bag
Load changes shoulder contact, edge angle and strap slip. Compare representative assemblies with the intended bag load and clothing contact.
Questions before you choose
What width of webbing is comfortable for a shoulder bag strap?
Comfort depends on contact width, bag weight, strap stiffness and clothing, not width alone. Compare several widths on a loaded bag, then check the narrower section through the adjuster. A wide strap may need a tapered connector or different hardware.
Should a decorative shoulder strap use cotton or synthetic webbing?
Choose by the required hand, cleaning, colour and adjustment behaviour. Cotton-rich surfaces can feel natural; synthetic constructions may respond differently to moisture and repeated adjustment. Test the visible face, clothing contact, folded ends and buckle movement on the complete bag.
Tell us what you are making
You can enquire before every detail is settled. Tell us the intended use and what you need help choosing; add dimensions or quantities if you know them.
What happens after your enquiry
We review the intended use and open specification questions first. Sample options, costs, minimum quantities and timing can then be discussed against that brief. Sending an enquiry does not place an order.
Request a relevant sample →