Coated webbing for washable pet leashes
A wipe-clean surface is only part of the design. Check cut ends, punched holes and hardware contact, where the textile core or coating may be exposed.
Content updated
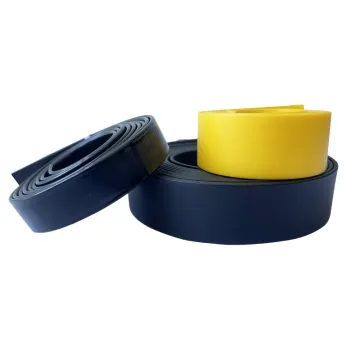
In this guide
Key choices for your project
Separate wipe-clean expectations from the construction of the whole leash. The coated face may clean easily while exposed cut ends and stitched holes retain dirt or moisture. Trial the finished connection and check grip with wet hands using the intended cleaning product.
- Exposed core at cut ends
- Grip when wet
- Cleaning around holes and seams
Does the coating crease or lift at the tightest hardware bend?
Wrap the finished coated tape around the smallest radius in the proposed clip or adjuster, then cycle bending under the buyer's representative condition. Inspect whitening, surface cracks, edge lifting and a visible textile line. Approve the exact coating and base-tape combination; coating colour alone does not predict bend behaviour.
- Coating condition on the inside and outside bend
- Edge lift or exposed textile beside the hardware
A wipe-clean face can hide vulnerable edges
Imagine a coated leash that wipes clean easily on its broad faces. After repeated flexing around the snap, the inside bend whitens, a cut end develops a raised lip and dirt remains around punched or stitched holes. When wet, the handle also feels less secure than the flat sample suggested.
Build the full handle and snap joint with the smallest intended bend, hole and end treatment. Apply the agreed dirt, moisture and cleaning sequence, then flex and operate the assembly. Inspect coating, exposed textile core, hand contact and hardware interface rather than judging only the cleaned face.
Approve the coated construction at bends, holes, cut ends and wet hand-contact areas on the finished leash.
Products to start with
Open a product to see its listed specification. Custom colours, dimensions and order terms are confirmed for your project.
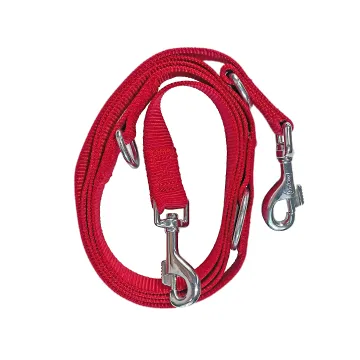
More product photos

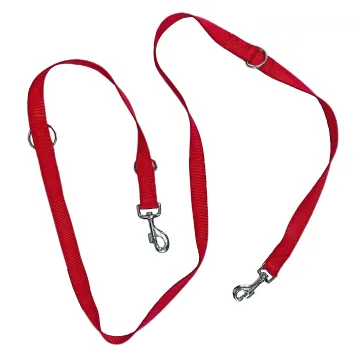
Can a damaged cut end be contained without a bulky repair?
Prepare the production cut-end treatment and deliberately inspect it after flexing, cleaning and contact with the connector. Note whether the coating separates from the textile core or forms a sharp lip. Compare capped, folded or otherwise specified samples only when those processes are confirmed feasible for the order.
- Coating-to-core bond at the treated end
- Finished end profile against hand and hardware
Specify coating interruptions
Connect cleanability to assembly operations that expose the core.
Swipe to see all columns ↔
| Field | What to record | How to confirm |
|---|---|---|
| Leash layout | Handle, snap joint, adjuster if used and visible coated spans | Mark each zone on a dimensioned assembly drawing |
| Coated construction | Base tape, coating reference, texture, finished section and edges | Retain a labelled physical material sample |
| Hardware bend | Part model, slot, smallest radius, wrap direction and layer count | Build the tightest production-intent interface |
| Cuts and holes | Cut method, punched or sewn locations and end treatment | Prepare representative finished openings and ends |
| Cleaning exposure | Dirt, moisture, cleaner, contact time and drying sequence | Apply the buyer-defined process to the assembly |
| Inspection outputs | Wet grip, whitening, cracks, edge lift, residue and exposed core | Examine inside and outside bends plus hand-contact zones |
Project-defined acceptance cannot be predicted from coating colour alone.
Download specification worksheet ↓Test the coating where assembly interrupts it
Map surface interruptions
Mark every cut, hole, stitch line, fold and hardware return on the leash drawing. Identify the smallest bend and hand-contact zones.
Build complete working ends
Make the handle and snap joint with production-intent coating, core, hardware, holes and end treatment. Preserve the proposed layer order.
Soil, clean and flex
Apply the agreed contamination and cleaning process, then operate wet and dry. Cycle the tight bends while watching grip and stiffness.
Open and inspect interfaces
Inspect faces, edges, holes, cut ends and both sides of each bend. Record whitening, lift, sharp lips, residue and exposed core.
Assumptions that overstate wipe-clean performance
Extending a face claim to the whole leash
Smooth coated faces may clean easily while holes, seams and cores retain residue. Evaluate every interruption on the assembled leash.
Comparing coating colour alone
The same colour can use different base tapes, thicknesses or textures. Approve the exact coated construction with its retained physical reference.
Bending a loose sample once
One room-temperature fold does not represent the tight hardware return or cleaning history. Cycle the complete joint under buyer-defined relevant conditions.
Questions before you choose
Is coated webbing easier to clean throughout a finished dog leash?
The coated face may wipe clean, but cut ends, stitch holes and exposed cores can retain dirt or moisture. Inspect the finished handle and snap joint after the intended cleaning method. A surface claim does not describe every part of the assembled leash.
Will a coated leash remain easy to grip when wet?
That depends on coating texture, handle shape, contamination and temperature. Test the complete handle with wet hands and the cleaning product the owner will use. Also check stiffness, edge feel and whether the coating marks or cracks after repeated bending.
Tell us what you are making
You can enquire before every detail is settled. Tell us the intended use and what you need help choosing; add dimensions or quantities if you know them.
What happens after your enquiry
We review the intended use and open specification questions first. Sample options, costs, minimum quantities and timing can then be discussed against that brief. Sending an enquiry does not place an order.
Request a relevant sample →