Custom webbing for dog leashes
Choose the leash length and handle layout before the tape finish. The clip connection and grip loop need a sewn trial using the proposed webbing.
Content updated
In this guide
Key choices for your project
Draw the leash from clip to handle and identify each overlap. State whether the quoted length includes the clip and handle loop. The hand loop should be tested after its lining, edge treatment and stitching are complete, since these details change the grip.
- Length measurement endpoints
- Clip-end overlap
- Finished hand-loop opening
Will the snap joint stay flat after repeated swivelling?
Build the clip fold with the final webbing face, stitch orientation and cut-end treatment. Rotate the snap through its full travel while the leash is lightly tensioned, then inspect whether the fold corkscrews, exposes a sharp end or rubs one edge. Approve the joint geometry before repeating it across an order.
- Fold alignment after repeated snap rotation
- Exposed end or one-edge abrasion at the joint
A loose tape can become a twisted leash
Imagine loose webbing that lies flat and feels comfortable in hand. Sewn around the snap, repeated swivelling corkscrews the fold and exposes a firm cut end. After the leash is coiled for retail, it opens with reverse bends and the printed face alternates along its span.
Build the handle and snap joints with the webbing, hardware, thread and end treatment. Rotate the clip while the leash is lightly tensioned, then handle the assembly in its intended dry or wet condition. Pack and store a sample in the proposed coil before opening it normally.
Approve the webbing through a complete leash whose joints, handling and packaged recovery have all been observed.
Products to start with
Open a product to see its listed specification. Custom colours, dimensions and order terms are confirmed for your project.
More product photos
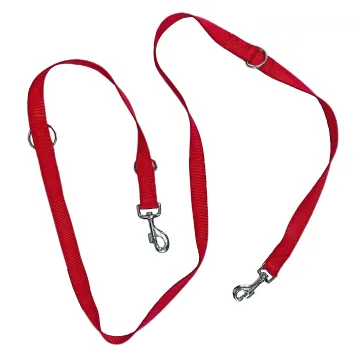
Does the packaged leash open without retained twist?
Coil one finished leash using the proposed retail pack and leave it for the planned storage simulation. Unpack it by the normal customer motion and observe loops, reverse bends and print-face orientation. Package diameter and tie position can create memory that is absent from a loosely stored sample.
- Twist and reverse bends immediately after unpacking
- Print-face orientation along the opened leash
Describe the tape inside the finished leash
Connect webbing faces and edges to joints, hardware, handling and packing.
Swipe to see all columns ↔
| Field | What to record | How to confirm |
|---|---|---|
| Leash context | Finished length, intended handling condition and buyer-defined product requirements | Use the complete leash trial |
| Webbing section | Width, thickness, edge, flexibility, face direction and surface | Inspect relaxed tape and curved joints |
| Snap connection | Snap model, opening, fold length, layers, cut end and stitch field | Build with production-intent parts |
| Handle connection | Grip opening, fold, reinforcement, seam and inside contact | Handle and flex the finished loop |
| Artwork route | Repeat, face direction, cut zones, folds and visible free span | Mark a full-length layout before sewing |
| Retail pack | Coil direction, diameter, ties, storage condition and opening motion | Pack and unpack the finished sample |
Product acceptance remains buyer-defined for the intended leash, dog size, hardware and use conditions.
Download specification worksheet ↓Move from tape to a packed leash
Map both sewn joints
Draw the snap fold, handle loop, stitch fields, cut ends and artwork route at full finished length before making the sample.
Build the complete leash
Use the proposed tape, snap, thread, end treatment and reinforcement, keeping face direction and joint layers traceable.
Swivel and handle it
Rotate the snap under light tension and grip the handle in the intended condition, checking twist, edge contact and hard points.
Pack, store and open
Coil the finished leash in the proposed retail format, apply the agreed storage simulation, then observe bends, loops and face orientation.
Shortcuts that hide finished-leash behaviour
Treating loose-tape strength as the answer
Tape data cannot describe snap rotation, sewn folds or handle contact. Set product requirements and evaluate the complete leash with its actual hardware.
Checking the snap joint once
A flat new fold may change after the swivel rotates repeatedly. Cycle the assembled joint and inspect alignment, abrasion and exposed ends.
Approving an uncoiled sample
Loose storage hides memory created by coil diameter, direction and ties. Open the proposed pack normally and inspect the full leash immediately.
Questions before you choose
What webbing features matter most in a custom dog leash?
Consider hand grip, edge feel, flexibility, wet handling and compatibility with the snap and handle joint. Strength of loose tape is only one input. Evaluate the complete leash, including stitching and hardware, against requirements set for the intended product and dog size.
Where should a logo be placed on a dog leash?
Keep the repeat readable along the free span and check what disappears inside the handle fold and snap attachment. If the leash twists, inspect both faces. Make one complete leash at the shortest length so cuts and folds do not leave partial logos.
Tell us what you are making
You can enquire before every detail is settled. Tell us the intended use and what you need help choosing; add dimensions or quantities if you know them.
What happens after your enquiry
We review the intended use and open specification questions first. Sample options, costs, minimum quantities and timing can then be discussed against that brief. Sending an enquiry does not place an order.
Request a relevant sample →