Padded handles for custom dog leashes
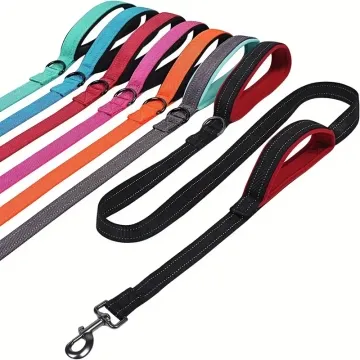
Padding changes the grip opening and seam bulk. Try the handle with the intended hand clearance, then check drying and edge comfort after use.
Content updated
In this guide
Key choices for your project
Specify the padding shape before choosing its softness. An overfilled handle can reduce the opening or make the seam bulky. Grip the complete loop with dry and damp hands, then check whether the lining shifts or traps water after the planned cleaning routine.
- Usable hand opening
- Lining movement
- Drying after cleaning
Will the padded cover creep away from the grip centre?
Mark the cover and insert at both ends before a repeated grip-and-release trial. Measure any relative movement and inspect whether foam becomes exposed or bunches near the handle return. Fix the insert locally only after checking that the fixing method does not create a hard point under the hand.
- Cover-to-insert movement at both ends
- Exposed or bunched padding near the returns
More padding can leave less usable room and place the seam under the palm
Imagine a leash prototype that feels plush when squeezed on the table. Once the insert, cover and folded webbing are assembled, the hand opening becomes tight for a gloved user and the bulky cover seam rotates into the main grip area under pull. After cleaning, the centre dries while the compressed transitions stay damp longer.
Define the usable opening and grip cross-section on the finished unloaded handle, not from insert thickness alone. Mark palm side, seam position and both transitions, then compare representative hand access, grip-and-release movement, directional pull and the agreed wet-clean-dry sequence. Open one sample to inspect migration and retained moisture.
Approve the complete padded loop by usable opening, seam position, transition comfort and drying behavior, not by foam softness alone.
Products to start with
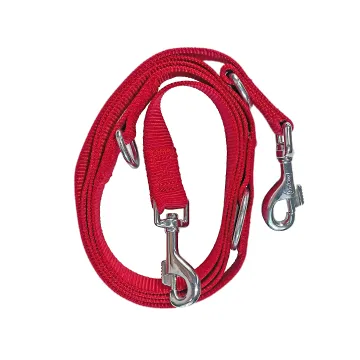
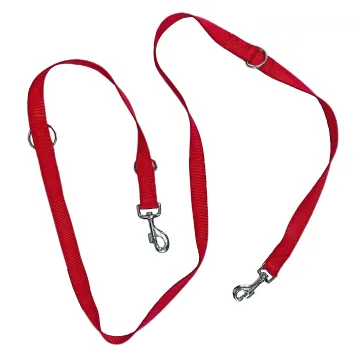
Open a product to see its listed specification. Custom colours, dimensions and order terms are confirmed for your project.
More product photos
Can the handle ends dry as thoroughly as the centre?
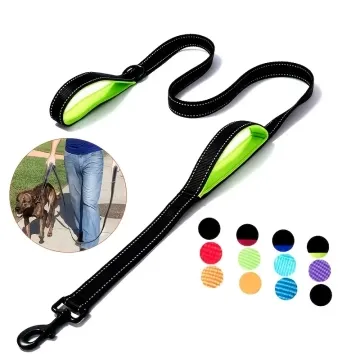
Wet and clean the complete handle using the agreed care routine, then compare the centre with the compressed transition into the webbing. Open a sample after the drying interval to inspect retained moisture, odour source or adhesive change. End tapers and closed seams often dry differently from the visible grip face.
- Drying condition at centre and both transitions
- Padding or adhesive state inside an opened sample
Specify the padded handle as a layered component
The record controls the finished grip geometry and internal arrangement so purchasing can reproduce the approved feel without hiding wet-care risks.
Swipe to see all columns ↔
| Field | What to record | How to confirm |
|---|---|---|
| Usable opening | Internal hand clearance, measurement points and unloaded orientation | Measure the completed loop on a simple agreed fixture |
| Layer stack | Base webbing, cover, insert, lining, adhesive or fixing and sample codes | Review a labeled cross-section and retained materials |
| Grip profile | Finished width, thickness, edge radius and compression observation | Measure and squeeze the same marked centre zone |
| Seam placement | Palm side, seam direction, thread exposure and distance from transitions | Mark on drawing and completed handle |
| Transition design | Insert taper, cover end, folded layers and attachment geometry | Inspect both ends under directional pull |
| Care observation | Wetting, cleaner, drying position, interval and internal inspection point | Condition complete handles together and open one specimen |
Hand sizes and comfort criteria belong to the buyer’s product evaluation; this record makes the compared handle constructions and conditions repeatable.
Download specification worksheet ↓Develop padding around the finished hand opening
Set geometry before softness
Define the intended internal opening, grip profile, palm side and pull directions, then allocate space for webbing, cover, insert and seam.
Build marked handle variants
Prepare coded constructions with identical loop length where applicable, marking cover, insert ends, centre grip, seam line and both transition zones.
Exercise the complete loop
Check representative hand entry, repeated grip and release, twist and directional pull, recording seam rollover, insert creep and hard contact points.
Condition and inspect inside
Apply the agreed cleaning and drying routine, compare centre and transitions at fixed intervals, then open one handle to inspect hidden layers.
Padding decisions that create a worse handle
Specifying only insert thickness
Cover tension, webbing layers and compression determine the finished profile. Record the entire stack and measure the assembled grip rather than the insert alone.
Judging softness on a flat swatch
A soft material can bunch, expose an edge or move the seam after assembly. Evaluate the closed loop through repeated gripping and pull directions.
Checking dryness only at the centre
Compressed tapers and closed returns can retain moisture differently. Compare both transitions with the centre and inspect an opened sample after conditioning.
Questions before you choose
What padding works best inside a dog leash handle?
Choose padding by grip thickness, compression recovery, moisture handling and how it meets the webbing edges. A very soft insert can bunch or hold water. Build the handle with the planned cover and seam, then squeeze, pull, wet and dry it.
Where should the seam sit on a padded leash handle?
Keep the seam away from the highest-pressure area of the hand when possible, without creating a bulky twist. Test several hand sizes and both pulling directions. Inspect exposed thread, edge rollover and padding migration after repeated gripping and loading.
Tell us what you are making
You can enquire before every detail is settled. Tell us the intended use and what you need help choosing; add dimensions or quantities if you know them.
What happens after your enquiry
We review the intended use and open specification questions first. Sample options, costs, minimum quantities and timing can then be discussed against that brief. Sending an enquiry does not place an order.
Request a relevant sample →