How to Choose Tent Guyline Cord and Adjusters
Guyline diameter cannot be selected separately from the tensioner, tent size and weather use. Visibility, wet handling, knot behaviour and packing also affect the useful system.
Content updated
In this guide
Key choices for your project
Begin with the tent maker's load case, routing and non-life-safety scope. Trial candidate cords through the actual tensioner and attachment points, then compare adjustment, holding, knot release and coiling while dry and after the buyer's wet-conditioning method. Choose colour or reflective detail for the defined visibility problem, not as a substitute for fit testing.
- Tent geometry and non-life-safety use
- Actual tensioner and attachment interface
- Dry and buyer-defined wet-condition trial
Fit diameter and surface to the tensioner
A cord that is too small for a slot may slip or cut into the contact edge; one that is too large may jam and become difficult to adjust with cold or wet hands. Braid texture and compressibility matter alongside nominal diameter. Mark a reference position, tension the sample through realistic angles and repeat adjustment before checking movement, flattening, glazing and damage at the hardware contact.
- Usable tensioner path and slot geometry
- Adjustment with dry and wet hands
- Reference mark, slip and contact wear
A guyline that holds dry can creep after rain and disappear at dusk
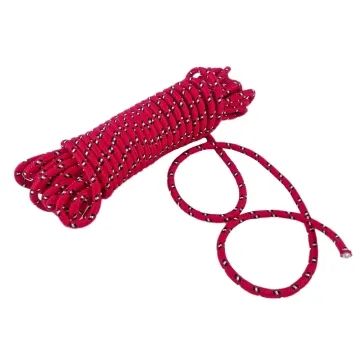
Imagine a tent guyline that grips its adjuster during a dry indoor setup. Overnight rain changes the cord surface and the knot-free route begins to creep as the shelter moves in gusts. At dusk, the dark line is hard to see across the campsite, while a reflective tracer appears only from certain angles. A thicker replacement improves visibility but no longer seats fully in the adjuster channel.
Choose the cord and tensioner as one routed system. Record cord construction and finished diameter range, the exact adjuster model, threading path, anchor and termination. Set up the production route at realistic angles and loads in dry and defined wet states, then operate it with expected hand protection and low-light viewing geometry. Observe grip, adjustment effort, damage, creep, tail security, tangling and visibility before approving the assembly.
Approve tent guyline cord with its exact adjuster and route, covering diameter range, dry and wet grip, cyclic movement, handling, termination and low-light visibility.
Products to start with
Open a product to see its listed specification. Custom colours, dimensions and order terms are confirmed for your project.
More product photos
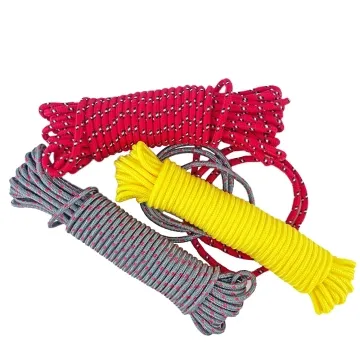
Separate daytime colour from reflected visibility
A bright colour improves contrast only against backgrounds where it remains distinct. Reflective yarn returns light toward a source but does not make a line visible from every direction or without illumination. Approve the chosen construction in the expected day, dusk and lamp-lit scenes. After wet conditioning, remeasure the marked length, retension the line, release the selected knot and coil it into the intended storage pocket.
- Contrast against expected ground and vegetation
- Reflective response in the intended viewing setup
- Wet length, knot release and coiling
Define the complete guyline, adjuster and visibility system
The record connects cord construction and diameter to hardware geometry, routing, environmental state, adjustment and campsite visibility.
Swipe to see all columns ↔
| Field | What to record | How to confirm |
|---|---|---|
| Cord reference | Fibre, braid, core, finished diameter range, finish, colour, tracer, lot and sample code | Measure conditioned production cord |
| Adjuster reference | Supplier, model, drawing revision, material, holes, channel, edges and intended cord range | Inspect approved production parts |
| Routing and ends | Threading path, tent anchor, ground anchor, knots or terminations, tail length and storage method | Build complete production route |
| Use states | Dry baseline, defined wetting, temperature range, contamination if relevant and recovery interval | Prepare matched routed samples |
| Operating sequence | Initial set, adjustment direction, load and unload cycles, gust simulation, glove state and retension rule | Run agreed assembly sequence |
| Acceptance observations | Slip or creep, adjustment effort, cord damage, tail security, tangling and visibility angles or distance | Record during and after use |
The buyer must define shelter loads, environmental sequence and visibility criteria; cord strength or reflectivity alone does not establish product suitability.
Download specification worksheet ↓Evaluate the cord through real routing and weather states
Pair cord with exact hardware
Confirm finished diameter range against the specific tensioner holes, channels, edges and threading direction using production pieces.
Build the complete route
Include tent attachment, ground anchor, terminations, tail length and storage arrangement at representative angles, span and tension.
Cycle dry and wet states
Apply the agreed wetting and load sequence, adjust repeatedly, and record creep, effort, damage and tail movement.
Check handling and visibility
Operate with expected gloves and inspect the routed line under defined low-light angles before retaining the approved system.
Guyline selections that separate cord from service conditions
Matching nominal diameter only
Finished diameter and compressibility govern how cord seats and grips. Check the production range inside the exact adjuster.
Testing grip only when dry
Water and repeated shelter movement can alter friction and creep. Run the routed system through the required wet sequence.
Assuming reflective means visible
Tracer area, twist, viewing angle and light direction control recognition. Evaluate the complete route under defined low-light conditions.
Questions before you choose
Is a thicker guyline always stronger or easier to use?
Not necessarily. Construction and material affect strength, while extra diameter can improve hand feel yet conflict with the tensioner, eyelet or storage. Screen rope data, then test the exact cord and hardware assembly under the tent maker's defined conditions.
Can this cord guidance be used for climbing or rescue?
No. This page covers non-life-safety tent guylines only. Climbing, rescue, fall protection or personnel support require purpose-designed certified systems selected and inspected under the applicable specialist standards.
Tell us what you are making
You can enquire before every detail is settled. Tell us the intended use and what you need help choosing; add dimensions or quantities if you know them.
What happens after your enquiry
We review the intended use and open specification questions first. Sample options, costs, minimum quantities and timing can then be discussed against that brief. Sending an enquiry does not place an order.
Request a relevant sample →