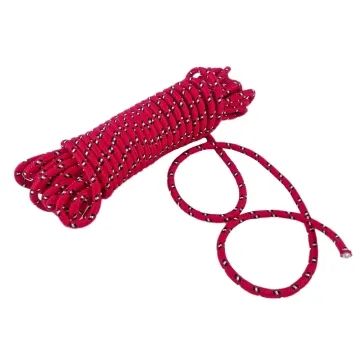
Reflective rope for dog leashes
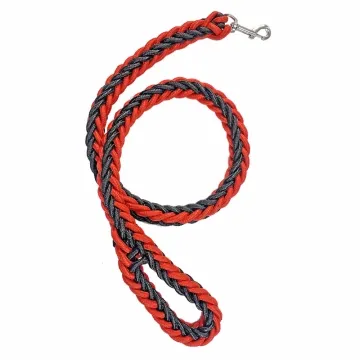
Reflective yarn placement changes as a round lead bends and rotates. Review the complete rope, handle and clip connection under consistent lighting.
Content updated
In this guide
Key choices for your project
Specify whether the reflective yarn runs as a tracer or forms a larger visible area. Rotation of a round rope changes what faces the light. Check several orientations and inspect the reflective strand after knotting, sewing or fitting the end hardware.
- Reflective strand layout
- Visibility at different rotations
- Strand condition at the termination
Is the reflective tracer exposed consistently along the braid?
Measure tracer pitch and visible surface position at the beginning, middle and end of a representative rope length. Bend and rotate those sections under one defined observation setup. Variation in braid balance can change exposure even when the same tracer yarn is present, so approve appearance over length rather than one close-up.
- Tracer pitch at three positions along the rope
- Visible tracer exposure while bending and rotating
A reflective yarn can be present while the finished leash shows an uneven signal
Imagine approving a close-up where the reflective tracer sits brightly on top of the braid. Across a finished leash, braid balance turns some repeats inward, the handle fold hides another section, and the clip sleeve compresses the last visible pitch. When the rope bends or twists during walking, the outward-facing path changes again.
Mark tracer pitch and surface position at the beginning, middle and end of a representative length. Build both terminations with production methods, then rotate and bend the complete leash under one buyer-defined observation setup. Repeat after representative flexing, wetting, cleaning and drying, recording coverage and damage without converting the observation into a universal distance claim.
Approve reflective exposure along the complete assembled leash, including movement and both terminations, rather than from one bright close-up.
Products to start with
Open a product to see its listed specification. Custom colours, dimensions and order terms are confirmed for your project.
More product photos
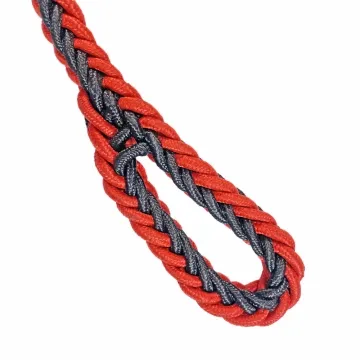
Does the end construction hide or damage the tracer?
Map where the tracer enters the handle return, sleeve or clip termination and inspect it after the agreed assembly process. Cutting, compression or stitching can bury, distort or nick the special yarn. Record the last visible repeat and protect the finished ends from metal contact in packaging.
- Last intact visible tracer before each termination
- Tracer condition after assembly and packaged handling
Connect tracer layout to the finished leash construction
The record separates tracer presence, visible exposure, assembly effects and buyer-defined observation so each can be checked.
Swipe to see all columns ↔
| Field | What to record | How to confirm |
|---|---|---|
| Rope construction | Diameter, braid, core, tracer material, count, pitch and sample code | Measure relaxed rope at three length positions |
| Leash geometry | Finished length, handle return, clip end and free rope zones | Overlay full-scale assembly drawing |
| Tracer exposure | Surface position, visible width, inward turns and last intact repeat | Rotate straight and bent marked sections |
| End construction | Cut, sleeve, splice, wrap, stitches, compression and protected zones | Inspect both production-built terminations |
| Observation and care | Light, viewer, background, flexing, wetting, cleaner, drying and cycles | Treat matched completed leashes consistently |
| Change record | Coverage variation, burial, distortion, abrasion, nicking and location | Compare marked zones with retained control |
Any visibility, safety or standards claim requires the buyer’s complete product method and acceptance criteria; this construction review alone does not prove it.
Download specification worksheet ↓Trace the reflective yarn from handle to clip
Map exposure over length
Measure tracer pitch and surface position at the beginning, middle and end, marking where braid rotation carries the yarn inward.
Build both terminations
Use production cutting, handle return, sleeve or wrap, stitching and clip attachment, then record the last intact visible repeat at each end.
Observe the moving leash
Rotate, bend and lightly tension the completed leash under fixed light, viewer and background, recording coverage separately from perceived brightness.
Repeat after representative use
Apply defined flexing, wetting, cleaning and drying cycles, then inspect the same marked sections for burial, distortion, abrasion or cuts.
Reflective-rope approvals that overstate the evidence
Approving one top-facing close-up
A favourable braid face hides inward turns and length variation. Inspect multiple positions while rotating and bending the finished rope.
Checking rope before end assembly
Sleeves, stitching, wraps and compression can bury or damage the tracer. Inspect the production-built handle and clip terminations.
Turning brightness into a distance claim
A bench observation does not establish universal visibility or safety performance. Keep claims within the buyer-defined method and verified evidence.
Questions before you choose
Does a reflective tracer make a rope leash visible along its full length?
Not necessarily. The tracer may spiral out of view, be covered by dirt, or disappear inside knots and sleeves. Inspect the finished leash from several angles after bending and cleaning. Define the observation condition instead of judging one flash photograph.
How should reflective rope be joined to leash hardware?
Choose a termination that fits the rope construction and preserves the tracer where possible. Supply the snap, sleeve or sewn joint for development. Evaluate the complete connection for movement, exposed core, sharp edges and product-level requirements; reflection does not establish connection strength.
Tell us what you are making
You can enquire before every detail is settled. Tell us the intended use and what you need help choosing; add dimensions or quantities if you know them.
What happens after your enquiry
We review the intended use and open specification questions first. Sample options, costs, minimum quantities and timing can then be discussed against that brief. Sending an enquiry does not place an order.
Request a relevant sample →