Woven trim for home textiles
Decorative trim must sit flat on the chosen textile. Check pattern direction, corner joins and colour transfer using a sewn sample and the planned cleaning method.
Content updated
In this guide
Key choices for your project
Review the trim on a full corner or junction of the intended textile, not just beside a fabric swatch. Pattern scale and stiffness can dominate a small cushion or curtain edge. Check the care instructions of both materials before approving the combination.
- Pattern scale on the finished textile
- Corner and junction appearance
- Compatible care instructions
Judge pattern registration through corners and joins
Lay the trim around a full cushion, curtain edge or other representative panel, then mark where motifs meet at corners and seams. A repeat that looks balanced on a straight swatch may create an obvious half motif at a mitre. Approve the cutting origin and join position together.
- Motif position at each corner
- Join location on the finished panel
A balanced straight trim can crowd the finished corner
Imagine a decorative trim whose motif looks centred beside the furnishing fabric. Around the actual cushion corner, the mitre cuts through a prominent element, the joined layers form a lump and the panel ripples after the planned care process. The straight swatch did not test the finished layout.
Map full motif repeats around one representative panel, choose the cut origin and permitted join, then sew with the intended fabric face, backing, seam path and feed direction. Apply the agreed cleaning sequence to the assembled panel and compare flatness, colour transfer, edge lift, hand and motif position with an untreated reference.
Approve home-textile trim on a complete corner or junction, with the base fabric, seam method and intended care sequence included.
Products to start with
Open a product to see its listed specification. Custom colours, dimensions and order terms are confirmed for your project.

More product photos
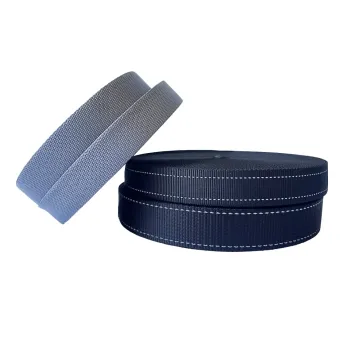
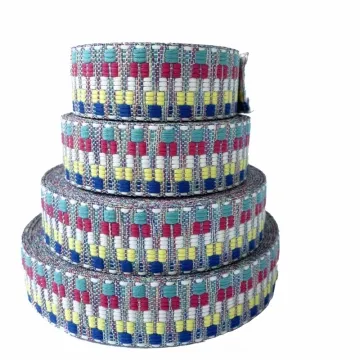
Run a sewing trial on the actual furnishing fabric
Sew the proposed trim to the production fabric with the intended seam path and feed direction. Inspect rippling, drag and seam roll after the panel rests. If the two materials feed differently, record the machine adjustment or assembly method that produced the accepted sample.
- Panel flatness after resting
- Recorded feed and seam method
Connect visual layout, sewing and care
Define how trim meets fabric through corners, seams, joins and cleaning.
Swipe to see all columns ↔
| Field | What to record | How to confirm |
|---|---|---|
| Trim reference | Construction, width, thickness, face, repeat, direction, shade, lot and sample code | Retain a direction-marked standard |
| Base textile | Fabric code, face, weight or build, colour, backing and care route | Use the intended production material |
| Placement layout | Origin, edge offset, corners, junctions, cut areas and permitted joins | Mark a full representative panel |
| Sewing method | Seam path, allowance, thread, stitch, feed direction and layer stack | Sew the limiting corner and join |
| Care comparison | Agreed cleaning and drying sequence, dimensional change, colour transfer and surface response | Compare treated assembly with control |
| Finished review | Panel flatness, rippling, edge lift, join bulk, motif position and hand | Inspect rested panels under agreed light |
Decorative suitability is specific to the trim, base fabric and care route. A loose colour match does not approve a sewn home-textile component.
Download specification worksheet ↓Build and care for the representative trimmed panel
Map the finished perimeter
Place full repeats around the shape and mark corners, junctions, cut origin and permissible joins.
Prepare paired panels
Cut treated and control components from identified trim and base fabric, preserving face, direction and measurement marks.
Sew the limiting details
Use the proposed thread, stitch, feed and layer stack to make the tightest corner and thickest join.
Apply care and compare
Run the agreed cleaning sequence, let panels rest, then compare dimensions, flatness, transfer, surface and motif placement.
Mistakes that a loose swatch cannot reveal
Choosing from colour alone
Matching shade does not show scale, stiffness or corner interruption. Review complete motif repeats on the finished panel.
Testing trim separately
Separate care results miss differential shrinkage and transfer at the seam. Clean the assembled trim and base fabric together.
Hiding the join during sampling
Production joins may add bulk or break the pattern. Put one permitted join into the representative approval panel.
Questions before you choose
How do I choose decorative webbing for cushions or home textiles?
Match the trim to fabric drape, washing method, skin contact and the way it will be sewn. A stiff relief can distort a soft cushion edge. Sew a full corner and seam, then check snagging, colour transfer and appearance after care.
Should home-textile trim be prewashed before production approval?
If the finished article will be washed, evaluate trim and base fabric together using that care process. Measure shrinkage and inspect puckering, twisting and colour transfer. Prewashing may be part of production, but the agreed sequence must match the approved prototype.
Tell us what you are making
You can enquire before every detail is settled. Tell us the intended use and what you need help choosing; add dimensions or quantities if you know them.
What happens after your enquiry
We review the intended use and open specification questions first. Sample options, costs, minimum quantities and timing can then be discussed against that brief. Sending an enquiry does not place an order.
Request a relevant sample →