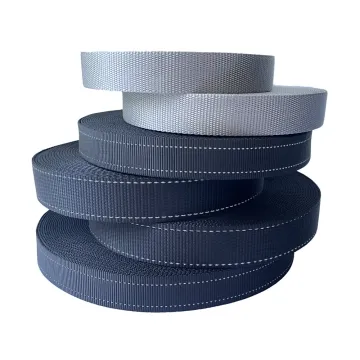
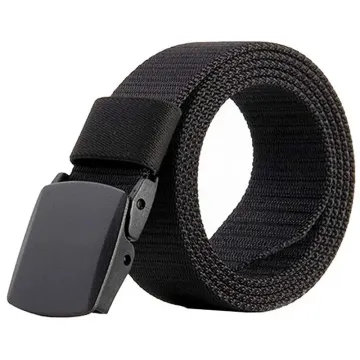
Branded woven ribbon for packaging
Packaging ribbon is often tied, folded or cut at a logo. Plan the visible repeat around the actual box and check whether the reverse will show.
Content updated
In this guide
Key choices for your project
Tie the ribbon around the actual box or bag before approving logo spacing. A bow may turn the reverse outwards and hide several repeats in the knot. Define cut lengths, end finish and packing units if the ribbon will arrive ready for the packaging line.
- Logo visible after tying
- Reverse face in the bow
- Cut and pack requirements
Set the cut point from the logo repeat
Map the finished ribbon length against the woven repeat before choosing a cut position. Allowing the cut to drift through lettering can create unusable tails even when the total length is correct. Mark the acceptable blank zone and decide how incomplete motifs at either end will be handled.
- Permitted cut zone within the repeat
- Logo completeness on both tails
A clear logo repeat can disappear in the bow
Imagine a ribbon approved flat because each logo is sharp and evenly spaced. At the packing station, the box consumes one repeat under the crossing, the next mark folds into the knot and one tail shows the reverse. A correct roll can therefore look inconsistently branded.
Tie the actual box or bag before fixing the repeat and cut point. Mark the visible top, loops and tails, then compare roll-fed and pre-cut handling. Adjust blank zones, motif orientation or winding so operators can reproduce the approved presentation.
Approve the artwork repeat together with package size, tying motion, cut zones, face orientation and supply format.
Products to start with
Open a product to see its listed specification. Custom colours, dimensions and order terms are confirmed for your project.

More product photos
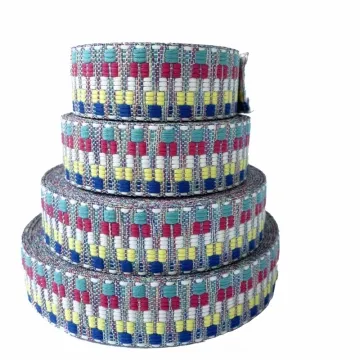
Verify orientation at the packing station
Run a small packing trial using the actual dispenser, tying sequence and operator handoff. Check whether the branded face stays visible as ribbon leaves the roll and whether the winding direction slows the task. Record the roll orientation and any starter-end identification on the approved pack instruction.
- Branded face through the tying sequence
- Roll winding and starter-end mark
Specify a packing operation
Link artwork to each fold, cut and visible area.
Swipe to see all columns ↔
| Field | What to record | How to confirm |
|---|---|---|
| Package set | Box or bag dimensions and shared ribbon sizes | Tie each size with a dimensioned dummy length |
| Tying sequence | Starting face, crossing, knot or bow and visible areas | Photograph the operation, top, loops and tails |
| Artwork repeat | Complete repeat, motif order, direction and spacing | Overlay a scaled repeat on finished lengths |
| Cut and end zone | Blank area, partial-motif rule and end treatment | Mark both ends and inspect visible tails |
| Face and reverse | Acceptable reverse and bow turns | Label both faces and follow them through the tie |
| Supply and station | Roll or pre-cut, winding, starter, count and dispenser | Trial the intended workstation |
Presentation, piece length and pack count are buyer-defined for each project.
Download specification worksheet ↓Move artwork approval onto the package
Tie unprinted layout lengths
Use the real package sizes and packing sequence to establish total length, hidden crossing, loop size and visible tails before positioning any motif.
Map the full repeat
Place complete motifs on visible spans, identify permissible cut zones and trace face-to-reverse turns. Check reading direction from the intended viewing side.
Trial the supply format
Run a small roll-fed or pre-cut set through the intended dispenser and handoff. Record winding direction, starter mark, end finish and counting method.
Freeze the packing reference
Retain tied examples for every approved package size together with artwork repeat, cut map and workstation instruction so appearance can be reproduced.
Approval shortcuts that move logos out of view
Approving only a flat ribbon
A balanced flat repeat may place motifs inside the crossing or knot. Approve artwork after tying the actual package with the intended motion.
Ignoring the reverse face
Bow loops twist and can present the reverse even when the top span is correct. Trace each turn and define an acceptable reverse appearance.
Choosing rolls or pieces by purchase convenience
The format changes cutting, counting, winding and waste at the station. Trial the real workflow before fixing piece length or roll presentation.
Questions before you choose
How should logo spacing be planned on ribbon tied around a box?
Tie the actual box with the intended bow before fixing the repeat. Knots hide several motifs and can turn the reverse outward. Place complete logos on the visible tails and top span, then check all box sizes and required cut lengths.
Should branded packaging ribbon be supplied on rolls or pre-cut?
Choose from the packing-line process, length control, end finish and waste. Pre-cut pieces save line handling but require exact box and bow allowances; rolls offer flexibility. Trial the real station and specify piece length, tolerance, end treatment, counting and pack unit.
Tell us what you are making
You can enquire before every detail is settled. Tell us the intended use and what you need help choosing; add dimensions or quantities if you know them.
What happens after your enquiry
We review the intended use and open specification questions first. Sample options, costs, minimum quantities and timing can then be discussed against that brief. Sending an enquiry does not place an order.
Request a relevant sample →