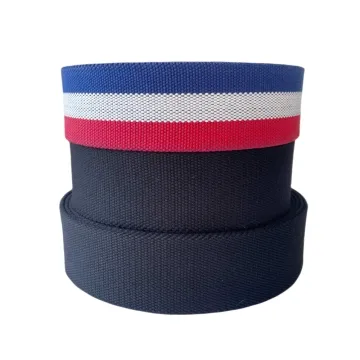
Custom woven belts and belt webbing
A belt is defined by its buckle as much as its weave. Check threading, stiffness, end finishing and adjustment range before approving the tape.
Content updated
In this guide
Key choices for your project
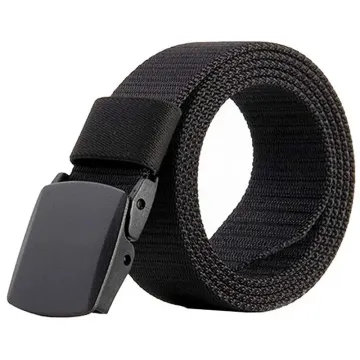
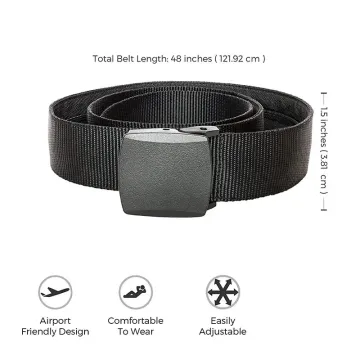
Specify the buckle mechanism before settling the band thickness. A friction buckle, prong buckle and sewn-in fitting do not use the same end construction. Approve the belt with its keeper and tip, including how the tail lies at the smallest setting.
- Buckle mechanism
- End-tip construction
- Tail position through the keeper
Check the belt under repeated adjustment
Thread the sample through the production buckle, mark its starting position, then adjust it repeatedly across the intended range. Inspect surface polishing, edge wear and movement at the mark. A band that holds once can still creep after the bar smooths the surface or compresses the weave.
- Position mark after repeated adjustment
- Wear at buckle contact
Repeated adjustment can make a belt creep
Imagine a casual belt secure at its first fitting. Repeated adjustment lets the buckle bar polish and compress the surface, moving the position mark. A punched hole pulls yarns, the shaped tip becomes bulky and the centred motif shifts after cutting. Loose-tape approval showed none of this.
Build the belt with the proposed buckle, adjustment system, tip and artwork. Mark its start, cycle the intended range and inspect wear and movement. Place it on a waist form to review curvature, edge contact, closure and tail handling, keeping claims within the evaluated casual application.
Approve the webbing through a complete belt after repeated adjustment, finished-end review and waist-form inspection.
Products to start with
Open a product to see its listed specification. Custom colours, dimensions and order terms are confirmed for your project.

More product photos
Prove the holes and tip can be manufactured
If the design uses holes or a shaped tip, approve those operations on the chosen construction rather than on loose tape. Check yarn pullout around punched holes and bulk at any folded or capped end. Confirm that decorative motifs remain centred after cutting and finishing.
- Hole edge after repeated use
- Finished tip shape and motif position
Describe the finished belt system
Link tape construction to buckle action, sizing, holes or tip operations and the intended product claim.
Swipe to see all columns ↔
| Field | What to record | How to confirm |
|---|---|---|
| Use and claim | Casual application, wearing condition and buyer-defined product requirements | Keep claims within the evaluated belt |
| Webbing section | Fibre, weave, finish, width, thickness, edge and hand | Inspect relaxed tape and curved belt |
| Buckle system | Buckle model, bar or prong, threading, contact faces and direction | Build with production-intent hardware |
| Size and adjustment | Finished size range, useful travel, free tail and marked positions | Cycle the complete belt across the range |
| Holes and tip | Hole process or alternative, spacing, tip shape, layers and end treatment | Make operations on the proposed construction |
| Artwork layout | Repeat, centreline, buckle fold, holes, cuts and visible zones | Overlay artwork on every critical size |
A casual belt should not receive safety or restraint claims from webbing dimensions or loose-tape data alone.
Download specification worksheet ↓Build and cycle the complete belt
Map sizes and closure
Draw each critical size with buckle path, adjustment range, free tail, holes or alternative closure, tip and visible artwork.
Make production-intent operations
Thread the proposed buckle, form the intended tip and create holes or adjustment features directly in the selected webbing construction.
Cycle marked positions
Mark the starting location and adjust repeatedly across the useful range, observing creep, surface polishing, compression, yarn pullout and edge wear.
Inspect on a waist form
Curve the finished belt around a representative form and review closure, contact edges, tail control, tip bulk and artwork position.
Shortcuts that hide belt-system problems
Inferring safety from width or strength
A casual belt and a restraint product have different requirements. Keep claims within the complete construction and application actually evaluated.
Testing buckle grip only once
Initial hold can change as the bar polishes or compresses the surface. Mark the position and repeat adjustment before approval.
Approving holes and tip on paper
Punching, folding or capping can pull yarns, add bulk and shift motifs. Perform these operations on the proposed webbing itself.
Questions before you choose
What webbing construction works for a custom casual belt?
Start with buckle type, desired hand, hole or adjustment method and edge contact. A decorative tape may not suit punched holes or repeated buckle bending. Build the complete belt and check waist curvature, closure, end finish and surface wear.
Can a fashion webbing belt be described as load-bearing?
Not without a defined use and product-level evidence. A casual belt and a safety or work-restraint product have different requirements. Keep the marketing claim within the evaluated application and do not infer capacity from webbing width, thickness or breaking-force data alone.
Tell us what you are making
You can enquire before every detail is settled. Tell us the intended use and what you need help choosing; add dimensions or quantities if you know them.
What happens after your enquiry
We review the intended use and open specification questions first. Sample options, costs, minimum quantities and timing can then be discussed against that brief. Sending an enquiry does not place an order.
Request a relevant sample →