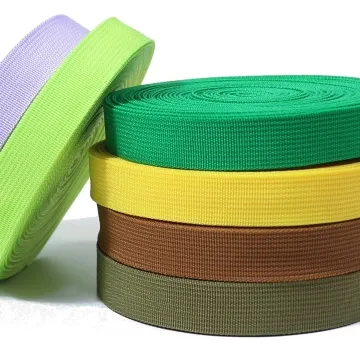
Webbing for bike bag attachments
Bike bag straps contact painted tubes and move with vibration. Map contact zones and check grit, rubbing and buckle clearance on the intended frame.
Content updated

In this guide
Key choices for your project
Map the strap route around the rack or frame and identify each rubbing point. The webbing sample should be trialled with the protective sleeve or backing planned for the bag. Check movement over the intended ride conditions and inspect contact areas afterwards.
- Contact points on rack or frame
- Protective backing arrangement
- Movement at the attachment
Does every loose tail stay outside wheel and drivetrain clearance?
Map tail position at minimum and maximum adjustment while the loaded bag moves through the bicycle's relevant steering, suspension or frame motion. Add the planned keeper and repeat the check after vibration. Final clearance and product safety must be validated by the bicycle-bag designer on the complete assembly.
- Tail position through the full bicycle movement range
- Keeper retention after the vibration simulation
A secure bag can still damage the bicycle
Imagine a frame bag that stays attached during a bench pull, yet creeps sideways on a rough route. A buckle then taps a painted tube and the loose tail approaches the chainring at the shortest adjustment. More strap tension may increase paint pressure without controlling either path.
Mark the bag at its light and heavy packed states, then follow every strap, buckle and tail through steering or suspension movement that affects the installation. Trial the intended protective layer and keeper before comparing slip, contact marks and removal access.
Approve the whole attachment route on the intended bicycle, including movement, protection and the user’s removal sequence.
Products to start with
Open a product to see its listed specification. Custom colours, dimensions and order terms are confirmed for your project.
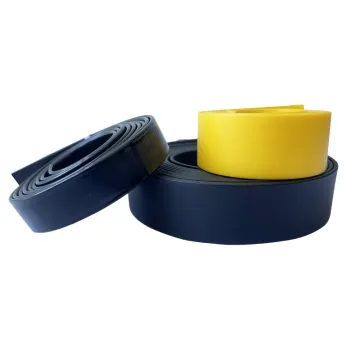
More product photos
Can the strap be removed without dragging hardware across paint?
Observe the normal installation and removal sequence with the actual buckle, hook or cam. Identify moments when a free metal or hard-coated part can swing against the frame. Change parking position, tether length or protective interface, then repeat the user motion rather than judging only the secured riding state.
- Hardware path during installation and removal
- Frame-contact protection at the parked buckle position
Describe the bicycle interface
Locate each strap and define what can move around it.
Swipe to see all columns ↔
| Field | What to record | How to confirm |
|---|---|---|
| Mounting location | Frame or rack area, cables and moving parts | Annotate photographs or a dimensioned installation drawing |
| Packed state | Representative light and heavy contents | Fit the complete bag in both agreed states |
| Strap route | Anchor, wrap direction, adjustment and loose-tail path | Trace the minimum and maximum settings |
| Hardware and keeper | Buckle model, threading, parked position and tail restraint | Build with production-intent parts and operate by hand |
| Protective interface | Sleeve or backing, coverage and edge position | Install it on the actual contact zone |
| Movement inspection | Relevant steering, suspension or vibration and observations | Agree where to inspect slip, polish, grit and paint contact |
Bicycle clearance and safety are defined on the complete assembly; a webbing swatch cannot establish them.
Download specification worksheet ↓Verify the route before freezing the tape
Map the bicycle envelope
Photograph the intended mounting area and mark cables, wheel, drivetrain, steering and suspension envelopes. Add strap positions for both adjustment extremes.
Build the complete attachment
Install the loaded bag with the intended webbing, hardware, keeper and protective layer. Record the threading direction and buckle parking position.
Reproduce use and removal
Move the relevant bicycle parts, apply the agreed vibration or handling sequence, then remove and refit the bag as a user would.
Compare observable changes
Measure strap migration and inspect webbing, protector and bicycle contact zones. Revise route or hardware position before approving the construction reference.
Assumptions that hide attachment problems
Judging only static tightness
A firmly pulled strap can still migrate when the bag oscillates. Evaluate the packed assembly through representative multidirectional movement and record progressive slip.
Treating protection as a generic sleeve
Coverage, seam position and trapped grit affect the contact. Trial the specified protector on the actual tube or rack surface and inspect both sides.
Checking only the secured state
Loose hardware can swing across paint during fitting, while a released tail can reach moving parts. Observe the full installation and removal path.
Questions before you choose
How should webbing for a bike bag be protected from frame abrasion?
Map every point where the strap, buckle or bag can move against the frame or rack. Trial the actual protective sleeve or backing with the chosen tape. After a representative ride or movement cycle, inspect both the webbing and painted contact surface.
What makes a bike-bag attachment strap stay secure on rough roads?
Security comes from the complete route, buckle geometry, strap tension, bag stiffness and anchor placement. Load the bag and reproduce movement in all directions. Check progressive slip, buckle rotation, edge wear and whether the strap can enter a wheel or moving component.
Tell us what you are making
You can enquire before every detail is settled. Tell us the intended use and what you need help choosing; add dimensions or quantities if you know them.
What happens after your enquiry
We review the intended use and open specification questions first. Sample options, costs, minimum quantities and timing can then be discussed against that brief. Sending an enquiry does not place an order.
Request a relevant sample →