Webbing straps for camping equipment
Define what the strap holds and how it is released. Check packed size, buckle access and wet adjustment on the actual camping item.
Content updated
In this guide
Key choices for your project
Describe the task precisely: keeping packed gear together differs from carrying or securing a load. For storage straps, trial the buckle with the actual bundle size and check adjustment with damp or gloved hands. Any load-related requirement needs its own assembly specification.
- Exact securing or carrying task
- Bundle size range
- Adjustment with gloves or moisture
Does the strap compress or damage the packed item beneath it?
Mark contact zones on the actual tent, mat or storage bag and tighten the strap to the buyer's defined packing condition. After the storage simulation, inspect fabric shine, insulation crushing, seam distortion and buckle imprint. Strap condition alone cannot show whether the bundled equipment has been harmed.
- Marks or distortion on the packed item's contact zones
- Buckle imprint and seam condition after storage
One kit can contain three strap jobs
Imagine a kit where similar straps bundle a sleeping mat, compress a tent bag and form a carry loop. In damp, dim conditions, the user selects the wrong strap; its buckle sits against a coated panel, the bundle is over-compressed and the tail is difficult to release with gloves. Calling them all outdoor straps hides different duties.
Separate bundling, compression, carrying and any load-securing task before choosing tape. Build each route around the packed item, label its intended position and operate it dry, damp and with gloves. Inspect both strap and equipment after storage and repeated repacking.
Approve each strap by task, equipment contact, adjustment access and visible kit code.
Products to start with
Open a product to see its listed specification. Custom colours, dimensions and order terms are confirmed for your project.

More product photos
Can the correct strap be identified in a mixed equipment kit?
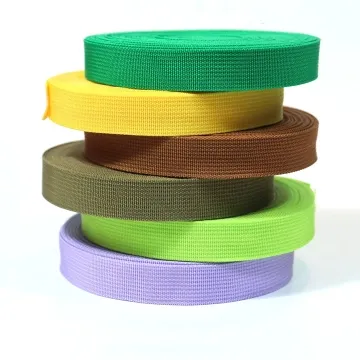
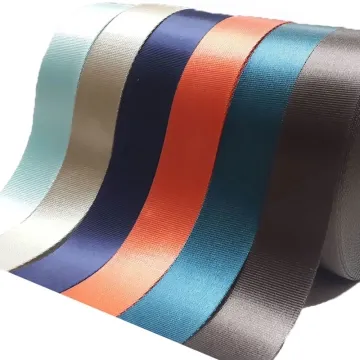
Assign a visible code for each strap position or packed item, then check recognition when components are folded, damp or dimly lit. Use colour, woven mark or label only after confirming the process. The code supports assembly and repacking; it should not be presented as a safety classification.
- Strap code visible in packed and loose states
- Code legibility after relevant moisture and handling
Describe strap and packed item
Distinguish each duty and the damage or confusion it could create.
Swipe to see all columns ↔
| Field | What to record | How to confirm |
|---|---|---|
| Task boundary | Bundling, compression, carrying or another role | Assign each strap a drawing callout and use |
| Packed range | Item, folded dimensions, fill and permitted compression | Fit the smallest and largest agreed bundles |
| Route and contact | Anchors, buckle position, seams and sensitive surfaces | Mark contact zones on the packed item |
| Adjustment access | Hardware, tail direction, release motion and glove condition | Operate the assembled strap dry and damp |
| Kit code | Colour, woven mark or label and where it remains visible | Check loose, packed and low-light recognition |
| Inspection sequence | Repacking, storage and observable changes | Review strap and item at agreed intervals |
A kit code supports repacking; it is not a safety class or product validation.
Download specification worksheet ↓Validate the strap on the packed equipment
Separate the jobs
List every strap in the kit and state what it holds, whether it carries weight and how the user releases it.
Build the packed-size range
Route each production-intent strap around the smallest and largest agreed bundle. Mark buckle, tail, seams and all pressure-sensitive contact zones.
Repack under relevant conditions
Cycle tightening and release while dry, damp and with intended gloves or contamination. Observe access, slip, tail control and mistaken selection.
Inspect both sides of the interface
After storage and repacking, examine tape, buckle and anchors as well as fabric shine, crushed insulation, seam distortion and hardware imprints.
Shortcuts that confuse durability with suitability
Specifying only “outdoor webbing”
That label does not distinguish bundling from carrying or securing. Define the exact role, route and complete-assembly evaluation for each strap.
Inspecting the strap but not the gear
A strap may remain intact while polishing fabric, crushing insulation or distorting a seam. Examine the packed item at every contact zone.
Treating a colour code as a safety code
Colour can aid repacking but may change or be poorly visible. Pair it with a clear position record and do not imply certification.
Questions before you choose
What webbing should be used for camping equipment straps?
Start with the actual job: bundling a mat, securing a bag and supporting a person require different products. Match the tape to buckle, exposure and sewn assembly. For any safety-critical use, evaluate the complete design under the applicable requirements rather than using general-purpose webbing.
How can an outdoor strap be checked for repeated packing and unpacking?
Build it with production hardware and cycle adjustment while dry, damp and contaminated with expected dirt. Inspect slip, edge wear, buckle contact and sewn ends. Also check the packed item for rubbing; a strap can survive while damaging the fabric beneath it.
Tell us what you are making
You can enquire before every detail is settled. Tell us the intended use and what you need help choosing; add dimensions or quantities if you know them.
What happens after your enquiry
We review the intended use and open specification questions first. Sample options, costs, minimum quantities and timing can then be discussed against that brief. Sending an enquiry does not place an order.
Request a relevant sample →