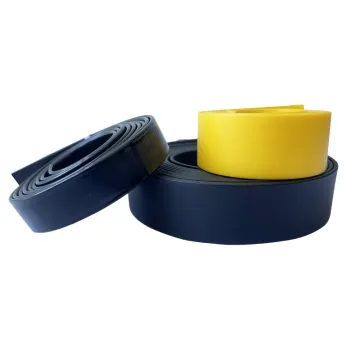
How to Evaluate Webbing for Kayak and Canoe Straps
A strap that grips a cam buckle when dry may behave differently after immersion, sand contamination or vibration. Roof paint and the boat surface also become part of the interface.
Content updated
In this guide
Key choices for your project
Treat webbing, buckle, protective pad, roof-rack path and sewn end as one buyer-controlled transport assembly. Compare dry, wet and grit-conditioned samples in the actual buckle, inspect movement and wear, and repeat the buyer's complete transport-system tests. Legal road use, safe working limits and installation instructions remain the buyer's responsibility.
- Actual buckle, pad and routing
- Dry, wet and grit-conditioned comparison
- Buyer-owned road-safety and system validation
Check buckle grip without damaging the tape
Wet fibres and trapped grit can alter friction at the cam, while aggressive teeth may mark or cut the surface during repeated tightening. Put reference marks on both sides of the buckle, apply the buyer-defined assembly load and vibration cycle, then measure movement and inspect glazing, pulled yarns, edge damage and buckle contamination. Repeat after cleaning to see whether grit remains embedded in the weave or mechanism.
- Reference marks for movement
- Tape and buckle contact damage
- Condition after cleaning and retensioning
Dry buckle grip disappears after water and grit enter the path
Imagine a kayak strap holding in a clean, dry cam buckle. After launching, wet tape carries grit into the mechanism; repeated tightening marks the face, the protective sleeve shifts and trapped particles rub both roof coating and hull. A strip result did not represent the transport assembly.
Treat webbing, cam buckle, sewn end, pad, rack route, hull contact and tail control as one buyer-designed system. Mark tape movement on both sides of the buckle, apply the agreed wet and grit states, then run buyer-defined load and vibration sequences. Clean, retension and open each contact before judging movement and damage.
Select webbing through the wet buckle and contact route; the buyer owns rating, instructions and transport-system validation.
Products to start with
Open a product to see its listed specification. Custom colours, dimensions and order terms are confirmed for your project.

More product photos
Evaluate every vehicle and boat contact surface
A protective sleeve may stop metal touching paint yet trap sand, water or a folded tape edge against the roof. Build the intended path over representative rack, coating and hull surfaces, including the loose-end management method. After the buyer's transport simulation, inspect pressure marks, abrasion, trapped particles, pad migration, buckle rotation and any location where the webbing rubs an edge. Do not infer road safety from webbing data alone.
- Representative rack, paint and hull surfaces
- Pad position and loose-end control
- Contact inspection after system simulation
Document the complete contact and restraint path
Make wet friction, grit, protection and movement traceable to one assembled specimen.
Swipe to see all columns ↔
| Field | What to record | How to confirm |
|---|---|---|
| Webbing and buckle | Construction, width, thickness, finish, direction, buckle code, lot and code | Retain the marked pair |
| Sewn and routed path | End fold, stitch pattern, buckle bars, rack route, direction changes and loose-tail control | Build the production-order assembly |
| Contact protection | Pad or sleeve material, position, coverage, closures and migration reference marks | Fit over representative surfaces |
| Exposure state | Dry, immersed or locally wet condition, grit introduction, cleaning and retensioning sequence | Label each specimen state |
| Buyer test sequence | Load, tightening, release, vibration or transport simulation and inspection points | Follow the buyer-approved procedure |
| Observed outputs | Movement, buckle rotation, glazing, pulled yarns, edge damage, particles, pad shift and marks | Measure references and photograph locations |
Material breaking force cannot establish an allowable transport load. Buyer must design, rate, label and validate the complete restraint system for its use.
Download specification worksheet ↓Expose, load, clean and reopen the full assembly
Build the real route
Assemble intended webbing, buckle, stitching, pad, rack path, hull contact and loose-end management in order.
Mark and expose
Place movement and pad-position marks, then create the agreed dry, wet and grit states without mixing specimens.
Run the buyer sequence
Tighten, load and vibrate according to the buyer-defined system procedure while recording movement at named checkpoints.
Clean and inspect contacts
Clean, retension and dismantle enough to inspect tape, buckle, pad, rack coating and hull surfaces together.
Shortcuts that overstate transport suitability
Testing a clean dry buckle only
Water and grit can change friction and damage. Compare named exposure states in the exact buckle and routing.
Treating a sleeve as automatic protection
A moving sleeve can trap particles or a folded edge. Mark its position and inspect every covered surface.
Inferring system rating from webbing data
Strip strength excludes buckle, seam, routing, vehicle and installation. Only buyer validation can establish the complete system rating.
Questions before you choose
Can webbing breaking force be converted into an allowable kayak-restraint load?
No. A material result does not establish the working limit of a buckle, seam, routing or vehicle-restraint system. The buyer must design, rate, label and validate the complete assembly for the intended boat, rack, vehicle, route and applicable rules.
Is water-repellent webbing automatically better in this use?
Not automatically. A finish can change wetting, buckle friction, sewing and grit retention. Compare the treated construction with the actual cam buckle and cleaning method, then validate the complete transport system rather than choosing from the finish name.
Tell us what you are making
You can enquire before every detail is settled. Tell us the intended use and what you need help choosing; add dimensions or quantities if you know them.
What happens after your enquiry
We review the intended use and open specification questions first. Sample options, costs, minimum quantities and timing can then be discussed against that brief. Sending an enquiry does not place an order.
Request a relevant sample →