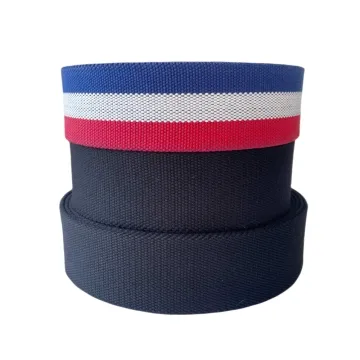
Webbing for Hat Chin Straps
A fashion hat chin strap runs across sensitive skin and through very small hardware. Edge feel, wet behaviour and the position of detachable parts matter as much as the tape width.
Content updated
In this guide
Key choices for your project
Approve the strap on the intended hat, not as loose narrow tape. Route it along the actual contact area, operate the adjuster with one hand and wear-test it after moisture exposure. Confirm attachment orientation and release behaviour on both sides of the hat.
- Rub the finished edge at chin and neck contact points while turning the head.
- Wet the strap as expected and check colour transfer, hand and adjuster movement.
- Verify the hole, hook or detachable fitting direction on a complete left-right assembly.
Comfort depends on edges and route
A soft face does not guarantee a comfortable strap if the narrow edge feels sharp or a folded end sits under the jaw. Map the strap path with the hat worn and locate adjusters away from pressure points. Compare samples after cutting and sewing, because end finishing and stacked layers can change the contact more than the loose tape surface.
A soft face can still create a sharp chin-strap edge
Imagine narrow tape that feels soft when flat. On the worn hat, a folded end sits under the jaw and its edge rubs during head turns. After sweat, the adjuster stiffens, darker tape marks light lining and one detachable fitting is reversed.
Map contact on the casual hat, including attachments. Build the strap with production cuts, seams, adjuster and detachable fittings. Wear it through agreed head movements, apply the buyer-defined moisture sequence, operate the adjuster with one hand, then dry and inspect edge feel, colour transfer, distortion and connection orientation.
Approve the complete casual-hat strap on both sides, before and after moisture, with skin contact, adjustment and detachable-part direction included.
Products to start with
Open a product to see its listed specification. Custom colours, dimensions and order terms are confirmed for your project.
More product photos
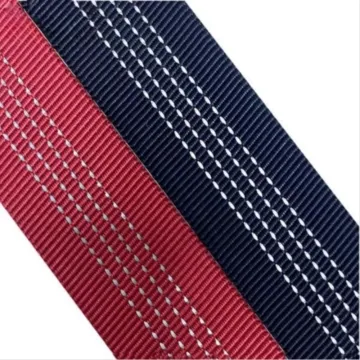
Moisture changes colour and adjustment
Sweat or rain can alter surface friction, make a small buckle harder to move and transfer colour to skin or lining. Check the wet strap with the real hardware, then dry it and inspect distortion. For detachable hooks or buttons, specify hole position, face and left-right direction so production does not reverse the connection.
Define the narrow strap around skin and small hardware
Connect comfort, wet behaviour and left-right attachment rather than approving loose tape hand.
Swipe to see all columns ↔
| Field | What to record | How to confirm |
|---|---|---|
| Use boundary | Casual or fashion hat, wearing position, intended user range and excluded protective use | Review the finished product brief |
| Skin-contact path | Chin and neck zones, strap angle, folded ends, seams and pressure points | Mark the worn hat |
| Tape construction | Fibre, weave, width, thickness, edge, hand, face and cut-end treatment | Retain a finished strap sample |
| Adjustment hardware | Part model, slot, threading, one-hand travel, stop and loose-end control | Operate it on the worn hat |
| Left-right attachments | Hole, hook or button position, face, direction, seam and release action | Build and label both sides |
| Moisture approval | Wetting source and state, companion material, drying, colour transfer, hand and distortion | Compare before, wet and dry states |
This brief is for casual hat accessories. Protective headgear needs its applicable product requirements, engineering and complete-system validation.
Download specification worksheet ↓Test comfort and operation on the worn hat
Map contact and direction
Place the hat on a representative wearer or form and mark chin, neck, adjuster, seams and both attachment orientations.
Build the complete pair
Cut and sew production-like left and right straps with intended hardware, end treatment, face direction and detachable fittings.
Wear, wet and adjust
Perform agreed head movements, apply the defined moisture condition and operate the adjuster one-handed while observing friction and transfer.
Dry and inspect
After the specified drying state, recheck edge feel, strap distortion, adjuster travel, lining marks and left-right release action.
Shortcuts that miss chin-strap problems
Approving soft surface hand
Edges, cut ends, seams and hardware touch differently from the flat face. Judge the finished strap during head movement.
Building only one side
Mirrored fittings can reverse face, hole or release direction. Assemble and label both sides before approving the connection.
Applying casual guidance to safety gear
Comfort checks do not establish protective performance. Route helmet or restraint projects through their product-specific requirements and complete-system validation.
Questions before you choose
Is soft-touch webbing automatically suitable for a chin strap?
No. The edge, seam, cut end and hardware can still rub. Assess the completed strap on the hat during head movement and after moisture exposure, rather than approving surface hand alone.
Can this guidance be used for protective helmet chin straps?
No. This page covers fashion and casual hat accessories. Protective helmets and safety restraints require product-specific standards, engineering and complete-system validation beyond a decorative or comfort strap assessment.
Tell us what you are making
You can enquire before every detail is settled. Tell us the intended use and what you need help choosing; add dimensions or quantities if you know them.
What happens after your enquiry
We review the intended use and open specification questions first. Sample options, costs, minimum quantities and timing can then be discussed against that brief. Sending an enquiry does not place an order.
Request a relevant sample →