Webbing for duffel bag handles
A travel bag handle transfers force into the bag body. Show the continuous path, overlaps and reinforcement fabric when asking for webbing and a sewn sample.
Content updated

In this guide
Key choices for your project
Follow the load path from the grip into the bag body. A longer sewn attachment or a wraparound construction changes the trial compared with a short tab. Check bulky overlaps beneath the handle wrap, where sewing difficulty can be hidden by the finished cover.
- Attachment length on the body
- Maximum overlap beneath the wrap
- Pair alignment when carrying
Will the paired handles finish at the same height?
Cut length alone does not control handle alignment. Mark the bag-panel datum, finished loop height and sewing start on both sides, then measure after the grip wrap is closed. A small mismatch becomes obvious when the bag is carried and can make one attachment take force before the other.
- Finished loop height from one panel datum
- Left-right difference after the wrap is sewn
A neat grip can conceal an unequal handle pair
Imagine two duffel handles cut to the same length. After sewing their ends through different panel stacks and enclosing the grip, one loop sits higher. The lower handle takes the initial pull; stepped ends form a ridge under the palm.
Mark a shared panel datum, loop height and attachment start. Build the pair with the intended panel, reinforcement and wrap, then carry the filled trial. Measure alignment under use, inspect each handle base, and open one grip to check hidden end position and layer movement.
Approve the paired handles as a bag assembly, including loop height, attachment path and construction hidden inside the grip.
Products to start with
Open a product to see its listed specification. Custom colours, dimensions and order terms are confirmed for your project.

More product photos
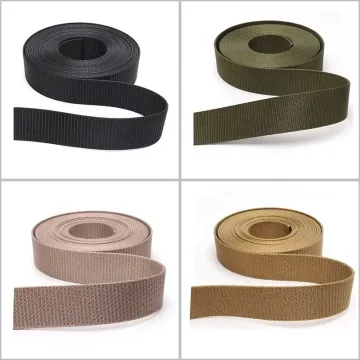
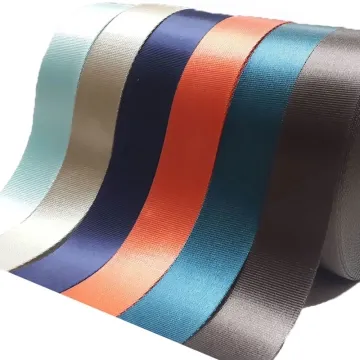
Does the hidden grip area remain smooth in use?
Open one completed grip wrap after a handling trial. Look for stepped cut ends, migrated layers, a seam ridge under the palm and abrasion where the two handles rub. This inspection reveals problems that an attractive outer wrap conceals and helps set the internal overlap drawing for production.
- Layer position inside the opened grip
- Ridges or abrasion at hand-contact points
Define the complete handle load path
Record geometry, attachment and hand-contact details together; a loose webbing strip cannot define the finished handle.
Swipe to see all columns ↔
| Field | What to record | How to confirm |
|---|---|---|
| Bag condition | Panel fabric, reinforcement, intended contents, fill shape and carry mode | Build the representative bag |
| Webbing construction | Fibre, weave, finished width, thickness, edge and hand | Retain an identified roll sample |
| Finished geometry | Panel datum, loop height, grip length, spacing and left-right relation | Measure the completed pair |
| Body attachment | Webbing path, insertion, overlap, fold, stitch zone and panel layers | Review a sectioned sewn sample |
| Grip construction | Wrap material, internal end layout, seam position, padding and closure | Open one completed grip |
| Approval states | Empty shape, filled carry, handling duration and inspection points | Photograph and record each state |
The buyer defines the representative contents, handling sequence and acceptance limits for the finished bag; tape data alone is not a safe bag-load rating.
Download specification worksheet ↓Build and inspect the paired handle system
Map the force path
Draw each handle from palm area through wrap, free loop, attachment stitches, reinforcement and bag panel using one shared datum.
Sew the complete pair
Cut, mark and sew both handles with intended panel layers, overlaps and grip components, preserving left-right marks throughout assembly.
Carry the filled trial
Handle the representative filled bag while observing loop alignment, grip comfort, twisting, panel distortion and which attachment begins taking force.
Open and reconcile
Measure the relaxed pair, inspect handle bases and open one grip, then reconcile hidden layer positions with the approved construction drawing.
Shortcuts that hide handle problems
Selecting from strip strength
A strong loose tape does not validate panel fabric, reinforcement or stitches. Evaluate the complete bag and locate the first structural change.
Equating equal cuts with equal loops
Fold take-up, insertion and sewing position alter finished height. Measure both handles from the same panel datum after the wrap closes.
Letting the wrap hide the build
An attractive cover can conceal stepped ends, migrated layers or a hard seam ridge. Open a retained trial before fixing production details.
Questions before you choose
Should duffel bag handles use one wide webbing or a folded multi-layer handle?
A single wide tape can reduce bulk; folded or layered construction can change grip and attachment, but also increases sewing thickness. Build both with the actual bag panel and load. Compare hand comfort, seam access, layer shift and stress at the handle base.
Where do duffel bag webbing handles usually need reinforcement?
Focus on the transition from free handle to the sewn bag panel, especially stitch ends and sharp folds. Reinforcement must suit the panel and load path. Test the complete bag and inspect where the webbing, seam or fabric begins to distort first.
Tell us what you are making
You can enquire before every detail is settled. Tell us the intended use and what you need help choosing; add dimensions or quantities if you know them.
What happens after your enquiry
We review the intended use and open specification questions first. Sample options, costs, minimum quantities and timing can then be discussed against that brief. Sending an enquiry does not place an order.
Request a relevant sample →