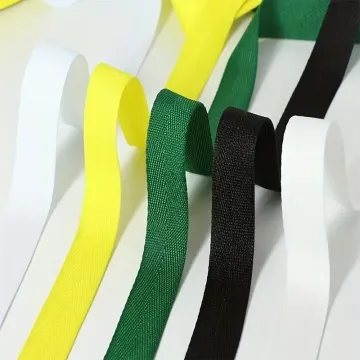
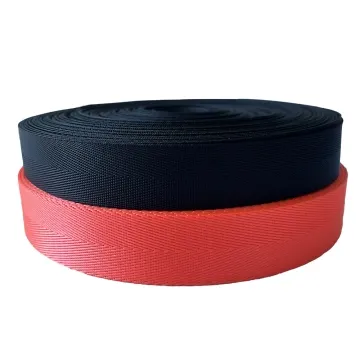
Pearl weave webbing for bags and accessories
Raised texture should remain comfortable where the strap touches skin or fabric. Bend and sew the sample to see whether the relief still reads clearly.
Content updated
In this guide
Key choices for your project
A raised bead-like pattern is a woven texture, not necessarily separate beads. Clarify the construction in the brief. Check snagging against the intended fabric and confirm that the raised section does not sit directly under a narrow buckle opening.
- Woven texture or added decoration
- Snagging against adjacent fabric
- Raised height at hardware
Raised pattern must survive placement as well as handling
Imagine a strap whose bead-like woven relief looks even on a loose sample. On an assembled piece, the buckle presses across a high motif, sewing flattens the next repeat and tight roll packing leaves one side slower to recover. Paired straps also begin at different phases, so their visible ends appear mismatched.
First state whether the effect is woven relief or attached decoration. Map complete pattern units onto the cut length, reserve flatter zones for seams and hardware, and compare processed parts with an untouched control after the agreed recovery time and contact trial.
Approve the texture on the finished layout, with pattern phase, compressed zones and recovery conditions defined.
Check whether finishing and packing flatten the relief
Put the sample through the intended sewing, pressing, winding and packing sequence before approving its raised appearance. A texture that looks clear off the loom may compress under a seam guide or tight roll. Compare the recovered part with an untouched control and define which zones may remain flatter because of assembly.
- Relief height after unpacking and recovery
- Flattened area created by the actual seam path
Place complete pattern units at visible cut ends
Map the raised repeat onto the finished cut length and mark any end that remains visible. A partial bead at a buckle return or decorative tip can look like damage even when technically correct. Set an acceptable cut window and inspect paired parts together before releasing the cutting plan.
- Complete motif at each visible end
- Matched pattern phase on paired components
Describe the relief and its place on the component
The specification should separate visual repeat, raised profile and assembly constraints.
Swipe to see all columns ↔
| Field | What to record | How to confirm |
|---|---|---|
| Construction type | Woven bead-like texture or attached decoration | Name the construction and retain a reverse-face image |
| Pattern repeat | Unit length, direction, face and acceptable cut window | Overlay repeats on the dimensioned component |
| Raised profile | High points, ground and defined appearance boundary | Compare side view and face with a coded control |
| Assembly zones | Seam, fold, buckle return, narrow slots and pressure areas | Mark zones on the full-scale layout |
| Contact pairing | Skin, garment, lining or surface touching the relief | Rub and flex the assembled orientation against that material |
| Process history | Sewing, pressing, winding, packing, unpacking and recovery time | Inspect processed parts beside the untouched control |
A decorative relief may compress or polish; acceptable change must be defined for the component.
Download specification worksheet ↓Place the repeat before cutting the final parts
Confirm the construction
Inspect face, edge and reverse to distinguish woven relief from added elements. Use the correct description in drawings, care review and inspection.
Map motifs and flat zones
Lay complete repeats over the cut length. Reserve acceptable low-profile areas for seams, folds, hardware contact and any visible cut end.
Process a paired set
Cut left and right parts at the intended phase, then sew, wind and pack them by the proposed route. Keep one unprocessed control.
Review recovery and contact
After the agreed unpacking interval, compare relief, phase and waviness. Flex against adjacent materials and record approved compressed zones on the layout.
Details that make a raised pattern look inconsistent
Calling every effect separate beads
A woven bead-like texture and applied decoration have different attachment and inspection questions. Identify the construction before discussing durability or care.
Approving only a loose sample
Presser-foot pressure, folds and tight winding can flatten the motif. Review a finished, packed and recovered part beside the original control.
Cutting without pattern phase
Nominally equal lengths can begin on different motif positions. Define a cut window and inspect paired visible ends together before release.
Questions before you choose
Is raised beaded-pattern webbing suitable for a frequently handled accessory?
It can add visual and tactile interest, but the relief may polish, snag or feel rough depending on yarn and construction. Rub it against the intended fabric and handle it repeatedly, then inspect the high points, edges and reverse before choosing it.
Will sewing flatten the raised pattern on beaded webbing?
It can, especially under presser-foot pressure or dense stitching. Sew the actual seam with the intended needle, thread and layers, and place stitches where pattern compression is acceptable. Check whether the relief recovers and whether the seam causes the tape to wave.
Products to start with
Open a product to see its listed specification. Custom colours, dimensions and order terms are confirmed for your project.
More product photos
Tell us what you are making
You can enquire before every detail is settled. Tell us the intended use and what you need help choosing; add dimensions or quantities if you know them.
What happens after your enquiry
We review the intended use and open specification questions first. Sample options, costs, minimum quantities and timing can then be discussed against that brief. Sending an enquiry does not place an order.
Request a relevant sample →