Tubular Webbing vs Flat Webbing: Which Structure Fits?
Tubular and flat webbing can share a width yet behave very differently in assembly. The right choice depends on whether the tape must accept an insert, collapse, fold cleanly or present stable edges.
Content updated
In this guide
Key choices for your project
Choose flat webbing when you need a defined face, stable edges and a straightforward sewing path. Investigate tubular construction when the design needs a hollow channel, a replaceable insert or a flattened double wall. Submit the required cross-section and assembly details first; quote tubular construction only after its equipment and sampling feasibility are confirmed.
- Draw the section in its open, flattened and installed states.
- Mark every insert, fold, seam and hardware contact point.
- Compare finished stack thickness, not nominal width alone.
An insert fits the open tube but cannot pass the finished attachment
Imagine a soft handle insert that slides into a short tubular sample. The full handle includes a folded return and a transverse attachment seam. After sewing, the return flattens the cavity and the seam closes the planned insertion route; the insert can no longer be replaced as the drawing intended. A flat sample with similar outside width never represented this problem.
Draw the open, flattened and installed sections, including every seam and insert access point. Prototype the whole route and test insertion at the intended production stage. Compare the tubular concept with a flat construction only against the functions each actually provides, then obtain manufacturing feasibility for the selected section.
Choose the cross-section and assembly sequence together; an empty cavity is useful only if the finished route preserves the intended access and function.
Start with the cross-section
Flat webbing is a single woven plane with two finished edges. Tubular webbing forms a continuous hollow sleeve that becomes two walls when pressed flat. That distinction matters more than the catalog width: a 25 mm tube may accept a core, while a 25 mm flat tape gives a predictable face for printing, stitching or hardware.
Trace the real assembly path
A tube can hide a cord or soft insert, but entry points, end treatment and internal movement must be resolved. Once flattened, its doubled walls can create bulky folds and resist tight turns. Flat webbing usually feeds through slots and sewing guides more simply. Test the actual insert and hardware rather than judging an empty swatch.
Use samples to confirm feasibility
For a flat option, approve width, thickness, edge feel and bend direction on a production-representative sample. For a tubular concept, send a section drawing, inner clearance, insert material, seam locations and cut-end plan for feasibility review. A successful flat sample does not establish that its hollow counterpart can be produced.
Record a hollow-section feasibility brief
Define the inside space and its transitions separately from the outside tape dimensions.
Swipe to see all columns ↔
| Field | What to record | How to confirm |
|---|---|---|
| Required function | Insert housing, collapsed double wall or flat strap, including service access | State the function on the section drawing |
| Section states | Open cavity, flattened width, wall build and installed occupied section | Provide dimensioned separate views |
| Insert reference | Material, cross-section, compressibility, ends and intended insertion stage | Retain an identified insert |
| Route restrictions | Folds, seams, hardware, access opening and closure positions | Overlay the full assembly path |
| Assembly trial | Insertion effort, wall movement, twist, local bulk and replacement access if required | Build and operate the complete route |
| Supply decision | Approved section, production method feasibility, sample revision and unresolved requirements | Supplier confirms the specific concept |
A concept drawing or flat tape approval does not confirm tubular production capability. Obtain a section-specific feasibility and sample decision before ordering.
Download specification worksheet ↓Validate the channel through assembly
Define the required section states
Draw the cavity open, flattened and installed, marking required inner clearance and the purpose of each wall or insert rather than inferring it from width.
Place every closure and crossing
Add seams, folds, hardware and end finishes, then show when and where the insert enters and whether later removal is required.
Prototype the complete route
Use the intended insert and finished joints, following the actual assembly order; observe obstruction, wall movement, twisting and occupied thickness.
Close feasibility before quotation
Submit the revised section and trial findings for manufacturing review, then tie any quotation to the confirmed construction and retained sample revision.
Cross-section assumptions that obstruct the finished product
Infer cavity size from flattened width
Wall thickness, section shape and deformation affect usable space. Specify the installed clearance and check it with the actual insert.
Assume the channel survives every seam
A seam or fold can close or restrict the route. Map the complete assembly and prove insertion at the intended production stage.
Treat a flat sample as tubular approval
Matching outside width does not establish wall construction, cavity or equipment feasibility. Request a separate review for the hollow concept.
Questions before you choose
Is flattened tubular webbing the same as double-layer webbing?
No. A tube has connected sides and an internal channel; two-layer webbing may be two separate tapes joined together or a purpose-built layered construction. The edge behavior, usable cavity and sewing stack therefore differ.
Can I request tubular webbing from this product range?
Yes. Provide the open and flattened cross-sections, material, width, wall requirement and assembly path for a feasibility review. Until that review is complete, do not plan it as a standard stocked tape or request a production quote.
Products to start with
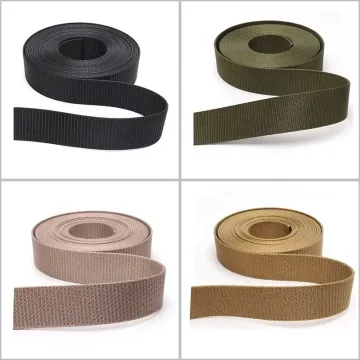
Open a product to see its listed specification. Custom colours, dimensions and order terms are confirmed for your project.

More product photos
Tell us what you are making
You can enquire before every detail is settled. Tell us the intended use and what you need help choosing; add dimensions or quantities if you know them.
What happens after your enquiry
We review the intended use and open specification questions first. Sample options, costs, minimum quantities and timing can then be discussed against that brief. Sending an enquiry does not place an order.
Request a relevant sample →