How to Fit Webbing to a Swivel Hook or D-Ring
A webbing can pass through a swivel hook eye and still make a poor connection. The fold may crowd rotation, the metal edge may abrade the strap or the seam may sit too close to the body.
Content updated
In this guide
Key choices for your project
Review the exact hardware and a full-size folded sample together. Match webbing width to the useful eye opening, check the doubled stack through its bend, leave enough clearance for the hook to rotate and place the stitch field where the machine can reach. Validate the complete hardware-webbing-seam assembly for its intended use.
- Measure clear eye width, thickness, edge radius and swivel envelope.
- Build the return with actual layers, end finish and stitch outline.
- Rotate and load the component while inspecting pinch and abrasion.
A secure fold can quietly block the swivel it is meant to support
Imagine a shoulder strap folded through a swivel hook. The seam is strong and the tape fits the slot, but the folded stack extends into the rotating barrel. Under light tension the hook turns; when the strap approaches from the side, the thick seam allowance catches the moving shoulder and the tape twists into one edge. A D-ring version instead slides toward a corner and bunches.
Start from the controlled hook or ring drawing, not its nominal opening alone. Define tape width and thickness, fold arrangement, layer count, seam position, tail containment and clearance around every moving part. Build with production hardware and stitching, then move the loaded strap through all intended approach angles and rotations. Observe contact, pinching, bunching, edge loading, seam migration and hardware movement before approving the complete attachment.
Approve hook and ring attachments as moving assemblies, with controlled hardware geometry, folded-stack thickness, seam placement, clearance and loaded approach angles.
Match the eye and webbing width
Measure the narrowest useful opening, not the outside hardware width. The tape should lie flat without bunching, yet avoid large side clearance that lets it twist or concentrate on one edge. Check whether the eye is straight, rounded or tapered. A nominally matching hook can still reduce the usable width through casting, plating or a center seam.
Protect rotation and the sewing field
Fold the exact tape around the eye and add every seam layer. A thick return can press against the swivel body and reduce movement. Set the first stitch far enough from the metal for foot and needle clearance, while leaving the designed stitch field and end protection. The dimension must come from a representative coupon, not a universal allowance.
Inspect metal contact and the complete joint
Feel for burrs, sharp plating edges, parting lines and narrow contact radii, then cycle rotation under representative direction of pull. Look for glazing, cut yarns, edge curl and metal finish transfer. Catalog hardware grade and finished load capacity are not promised here; the buyer must specify and test hardware, webbing and stitching as a complete connection.
Write the attachment around movement and clearance
The record links the exact hardware drawing to the tape stack, seam, retained tail, movement envelope and complete-assembly observations.
Swipe to see all columns ↔
| Field | What to record | How to confirm |
|---|---|---|
| Hardware reference | Supplier, model, drawing revision, material, finish, slot, radii and moving-part envelope | Measure approved production hardware |
| Webbing reference | Fibre, weave, width, thickness, finish, edge, lot and approved face | Compare retained tape sample |
| Fold arrangement | Threading path, fold direction, layer count, return length, tail treatment and reinforcement | Section marked attachment |
| Seam definition | Pattern, position, dimensions, thread, stitch setting and distances from fold and tail | Inspect production-equivalent seam |
| Clearance map | Minimum gaps around barrel, gate, eye, ring corners and nearby product components | Sweep assembly through movement |
| Loaded response | Approach angles, rotation, sliding, pinching, bunching, edge loading, seam shift and damage | Observe under defined assembly load |
The buyer must define load, cycles and product acceptance; hardware rating and webbing strength do not establish the capacity of their sewn connection.
Download specification worksheet ↓Develop the connection through its full movement envelope
Control the hardware geometry
Use the exact drawing revision and measure slot, radii, barrel, gate and moving envelope on approved production pieces.
Build the folded stack
Thread the specified face and direction, then reproduce layers, return length, tail treatment, reinforcement and production seam position.
Sweep every approach angle
Move the loaded strap through intended rotations and side approaches while watching contact, sliding, pinching, bunching and edge loading.
Inspect and retain attachments
Compare movement before and after cycling, open representative seams, and retain hardware, tape and signed construction references together.
Attachment checks that miss moving interference
Checking slot width only
A tape may enter the slot while its folded thickness blocks the barrel or gate. Measure the full movement envelope.
Pulling in one straight direction
Swivel hooks and rings change alignment during use. Check side approaches, rotation, corner migration and load transfer across edges.
Placing the seam too close
A bulky seam near the eye can catch moving parts or force an abrupt bend. Control its position and stack.
Questions before you choose
Should webbing width equal the hook eye width exactly?
Not by nominal numbers alone. The tape needs usable clearance without bunching or excessive sideways travel. Measure the narrowest opening and approve a fully folded production sample in the hardware.
Why does a swivel hook stop rotating after sewing?
The doubled return or seam can press against the swivel body, especially under load. Reproduce the full stack and required rotation envelope under load before fixing fold and stitch dimensions.
Products to start with
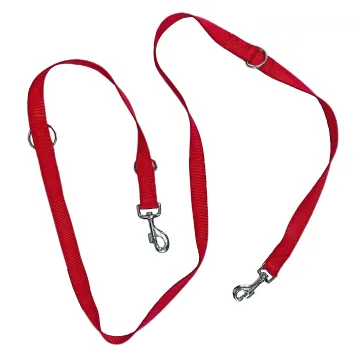
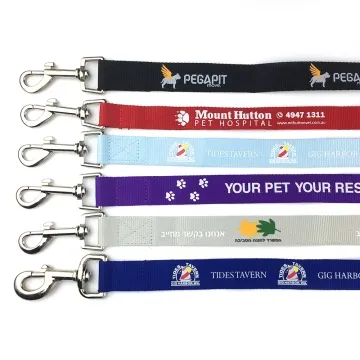
Open a product to see its listed specification. Custom colours, dimensions and order terms are confirmed for your project.
More product photos
Tell us what you are making
You can enquire before every detail is settled. Tell us the intended use and what you need help choosing; add dimensions or quantities if you know them.
What happens after your enquiry
We review the intended use and open specification questions first. Sample options, costs, minimum quantities and timing can then be discussed against that brief. Sending an enquiry does not place an order.
Request a relevant sample →