How to Develop a Custom Fluorescent Webbing Color
A fluorescent target is more than a bright ordinary color. Its visual effect depends on special colorants, base fiber, surface, ultraviolet content in the light and the limits of the chosen process.
Content updated
In this guide
Key choices for your project
Submit a physical color target, intended fiber, final use and viewing environment before requesting a production match. Fluorescent yarn and its measurable optical effect require project-specific feasibility confirmation. Treat the request as color development, not a standard stocked shade, and approve a representative physical sample rather than a screen preview.
- State whether the target is fluorescent, high-visibility or simply saturated.
- Identify fiber, width, weave, finish and companion materials.
- Review samples under named daylight and artificial light sources.
One ‘neon lime’ can become three different targets under different light
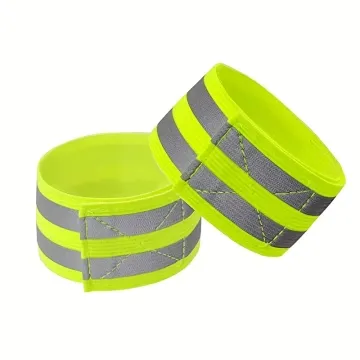
Imagine a running accessory whose screen artwork shows electric lime, while the supplied plastic buckle and paper color chip disagree under warehouse light. The buyer has also called the target both fluorescent and high-visibility, although those terms do not define one reproducible textile color.
Separate the visual brief from any claimed performance. Fix the fiber, weave and finish, name the physical master and viewing lights, then compare feasible fluorescent and vivid non-fluorescent samples beside the real buckle. Photograph the setup for communication, but approve the labeled physical sample itself.
Approve the optical effect, construction and viewing condition together; a digital color value alone cannot control fluorescent webbing.
Define the effect before the color
Fluorescent color absorbs shorter wavelengths and re-emits visible light, creating an effect that ordinary saturated dye does not reproduce. Buyers sometimes use “neon” for any vivid lime, orange or pink. Clarify whether the requirement is a visual daytime effect, a brand shade or a measured product property. These targets lead to different materials and evidence.
Expect fiber and process limits
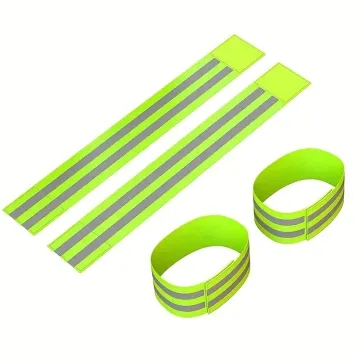
The reachable gamut changes with polyester, nylon, yarn form, weave density and finish. A paper chip, plastic part and textile may never look identical. Reflective trim is also a different mechanism and should not be treated as proof of fluorescent capability. Compare feasible sample routes, including a bright non-fluorescent fallback when exact effect is not available.
Approve under real viewing conditions
View the webbing beside its companion materials in the intended daylight and indoor environment. Keep the physical reference, sample code, face, light sources and photographs of the setup, while recognizing that cameras distort neon colors. Recheck any required rubbing, light exposure or cleaning behavior on the exact developed construction using an agreed method.
Build a usable fluorescent-color development record
This sheet identifies the target and comparison conditions without implying that brightness, visibility or durability has already been proven.
Swipe to see all columns ↔
| Field | What to record | How to confirm |
|---|---|---|
| Effect requested | Fluorescent effect, vivid ordinary shade or reflective element | Review the brief and label each function separately |
| Physical master | Chip, textile or companion component; face and supplier code | Seal and label the agreed reference |
| Tape construction | Fiber, yarn form, weave, width, finish and face | Compare only samples made to the intended construction |
| Viewing setup | Named daylight and artificial light sources, background and orientation | View master and samples together in the recorded setup |
| Acceptance method | Visual hierarchy and any buyer-defined instrumental comparison | Agree decision rules before color trials begin |
| Downstream checks | Cleaning, rubbing, light exposure and companion-material contact required | Test the exact approved construction by agreed methods |
Pantone or screen values can communicate direction, but the retained physical sample and named viewing conditions govern the final visual approval.
Download specification worksheet ↓Develop the color without losing the optical brief
Resolve the requested effect
Ask where and why the color must appear bright, distinguish fluorescence from reflection or ordinary saturation, and issue a short written effect brief.
Choose a feasible construction route
Review fiber, yarn, weave and finish together, then prepare clearly coded routes rather than changing both color system and tape construction without traceability.
Compare under named lights
Place every sample beside the master and companion parts on a consistent background, inspect under agreed lights, and record metameric or surface differences.
Freeze and challenge the selection
Retain the approved sample with its code, then repeat required care, rubbing or exposure checks on that construction before releasing the production color standard.
Mistakes that make neon approvals drift
Using ‘neon’ as the whole specification
The word may mean fluorescent, highly saturated or reflective to different teams. Define the intended optical mechanism and the viewing context explicitly.
Approving from a photograph
Cameras clip intense colors and displays render them differently. Use images to document arrangement, while making the color decision against physical samples.
Changing fiber after color approval
Fiber, yarn and finish change reachable color and surface appearance. A construction change requires a new color comparison, even with the same recipe name.
Questions before you choose
Is fluorescent webbing the same as reflective webbing?
No. Fluorescent color increases daytime visual intensity under suitable light; reflective material returns incident light toward its source. These are different optical mechanisms, and one feature does not establish the other.
Can a fluorescent color be approved from a digital file?
No. Screens cannot reproduce the same optical effect consistently, and cameras often clip vivid colors. Use digital files for layout only, then approve a physical sample under named lighting conditions.
Products to start with
Open a product to see its listed specification. Custom colours, dimensions and order terms are confirmed for your project.
More product photos
Tell us what you are making
You can enquire before every detail is settled. Tell us the intended use and what you need help choosing; add dimensions or quantities if you know them.
What happens after your enquiry
We review the intended use and open specification questions first. Sample options, costs, minimum quantities and timing can then be discussed against that brief. Sending an enquiry does not place an order.
Request a relevant sample →