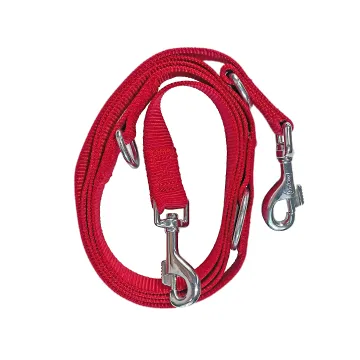
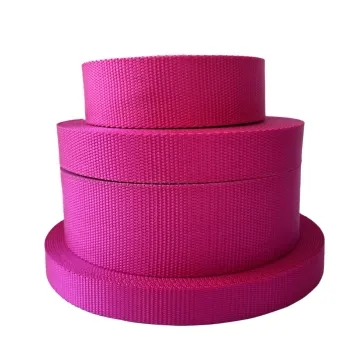
Webbing for dog harnesses
Harness straps meet at changing angles. Map each adjustment point and seam intersection, then test the full harness instead of approving isolated tape lengths.
Content updated

In this guide
Key choices for your project
Map the chest, shoulder and belly sections separately; each may bend or adjust differently. Check intersections where several straps meet and seams near the movement zones. Fit testing belongs to the finished harness, with webbing, padding and hardware all in place.
- Strap paths around movement zones
- Thickness at intersections
- Adjustment with padding installed
Do strap junctions stay clear of moving limb areas?
Mark shoulder rotation, front-leg clearance and chest movement on a fitted prototype, then trace each junction through the full size adjustment. A crossing that looks centred while standing can migrate during walking. Record the minimum clearance and move bulky seams or rings before changing padding to hide contact.
- Junction clearance during leg movement
- Position shift from minimum to maximum adjustment
A harness can fit standing and rub in motion
Imagine a padded harness centred on a stationary body form. As the front leg moves, a bulky junction migrates toward the limb and one edge rubs. At minimum adjustment, padding covers an adjuster and traps its tail. The bare strap layout did not reveal either interference.
Map shoulder rotation, front-leg clearance and chest movement across the intended size range. Build the complete harness with final padding thickness, binding, hardware, returns and junctions. Adjust it on suitable body forms without lifting the pad, then move the relevant areas and inspect junction clearance, edge contact, twist, hardware access and tail control.
Approve webbing routes and widths on complete padded harnesses while adjustment and body movement are both represented.
Products to start with
Open a product to see its listed specification. Custom colours, dimensions and order terms are confirmed for your project.
More product photos
Can each adjuster still be reached after padding is installed?
Build the harness with its final padding thickness, binding and strap returns. Adjust it on the body form without lifting or folding the pad, and check whether loose tails remain visible and controllable. An accessible bare-frame adjuster may become trapped at a padded edge or beneath another strap.
- Finger access to every adjuster in the finished harness
- Tail visibility and movement beside padded edges
Specify each strap in the moving harness
Treat chest, girth and connector routes separately where contact, space or hardware changes.
Swipe to see all columns ↔
| Field | What to record | How to confirm |
|---|---|---|
| Size and form | Critical sizes, adjustment ranges, body-form references and movement areas | Fit complete size samples |
| Strap map | Chest, girth, shoulder and connector routes, faces and visible tails | Mark every route on the pattern |
| Webbing section | Width, thickness, edge, flexibility and hand for each route | Inspect relaxed and curved sections |
| Padding system | Padding thickness, binding, backing, edge and overlap with webbing | Build the final cross-section |
| Hardware access | Adjuster and ring models, openings, finger access, return and tail path | Operate after padding is installed |
| Junction clearance | Crossing position, seam bulk, minimum limb clearance and shift through adjustment | Observe the fitted moving assembly |
Fit and comfort acceptance remain buyer-defined for the intended harness sizes, body forms and use conditions.
Download specification worksheet ↓Move from strap map to movement trial
Map adjustment and motion
Draw every strap and junction at size and adjustment extremes, then mark shoulder, chest and front-leg movement beside the routes.
Build the final cross-section
Assemble production-intent webbing, padding, binding, hardware, folds and seams so all bulk and access constraints are present.
Adjust without moving padding
Fit each critical sample on its body form and operate every adjuster while the pads and crossing straps remain normally positioned.
Move and inspect clearances
Reproduce relevant limb and chest movement, checking junction migration, edge contact, twist, tail control and access before retaining samples.
Shortcuts hiding harness interference
Applying collar logic to a harness
A harness crosses several moving areas and junctions. Map each route and evaluate the complete assembly instead of one isolated strap.
Testing a bare strap frame
Padding and binding add bulk and can trap adjusters or tails. Install the final cross-section before checking fit and access.
Standardising one width too early
Chest, girth and connector routes may have different space and contact needs. Prove every route and critical size before standardisation.
Questions before you choose
What makes webbing suitable for a dog harness rather than a collar?
A harness uses several straps around moving body areas, so flexibility, edge feel, adjuster travel and junction bulk matter. Map each strap separately. Fit a complete harness through the intended size range and inspect rubbing, twist and pressure at crossings.
Can the same width webbing be used throughout a dog harness?
Only if every route, adjuster and contact area supports it. Chest, girth and connector straps may have different space and comfort needs. Prototype all sizes, especially the smallest, and check folded thickness where multiple straps meet before standardising one width.
Tell us what you are making
You can enquire before every detail is settled. Tell us the intended use and what you need help choosing; add dimensions or quantities if you know them.
What happens after your enquiry
We review the intended use and open specification questions first. Sample options, costs, minimum quantities and timing can then be discussed against that brief. Sending an enquiry does not place an order.
Request a relevant sample →