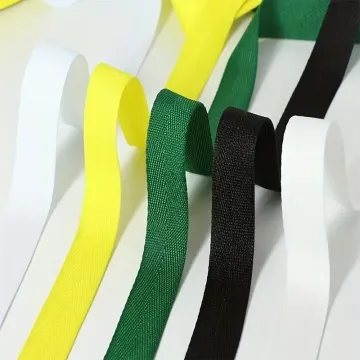
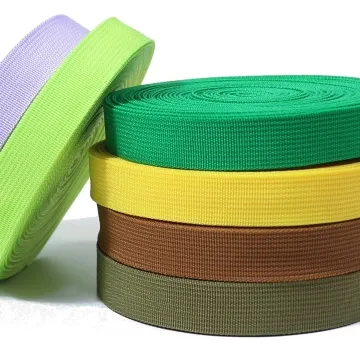
Webbing for apron neck straps
An apron strap needs comfortable neck contact and repeatable adjustment. Test the folded ends and buckle with the actual apron weight and care routine.
Content updated

In this guide
Key choices for your project
A neck strap is judged in contact with skin and clothing over repeated wear. Test the adjustment hardware near the neck and the strap after washing with the apron fabric. If colours differ, check transfer onto the lighter material around the attachment.
- Neck-contact edge
- Adjuster position when worn
- Colour transfer and wash shrinkage
Does the strap angle keep the apron bib centred?
Mark both neck-strap anchors from a common bib datum and assemble the apron with its pockets or tools loaded as intended. Observe whether the bib rotates, one edge rises or an anchor twists. Correct attachment angle and symmetry before changing strap softness to compensate for an off-centre garment.
- Anchor position and angle from one bib datum
- Bib alignment with intended pocket loading
Comfort changes when the apron carries real weight
Imagine an apron that feels comfortable during a standing fit check. Once tools fill a front pocket, the bib pulls forward, one neck-strap edge concentrates pressure and the adjuster shifts toward the wearer’s hair. A softer swatch alone would not correct an uneven anchor or a poorly placed fitting.
Trace the force from loaded pocket through bib, neck anchors and waist ties at several worn settings. Then assess edge contact, adjustment access and colour or dimensional change after the intended care sequence on the complete apron.
Approve the strap by worn setting and apron load, with hardware position and care history recorded.
Products to start with
Open a product to see its listed specification. Custom colours, dimensions and order terms are confirmed for your project.

More product photos
Does the adjuster remain away from hair and pressure points?
Map the adjuster and free tail at the shortest, middle and longest worn settings on representative users or forms. Check contact near hair, collar seams and the side of the neck during head movement. Move the hardware or change the adjustment direction if it repeatedly enters a sensitive zone.
- Adjuster position across the worn range
- Contact during head turn and downward movement
Specify the worn system around the neck
The RFQ should connect tape construction to apron geometry, body contact and cleaning.
Swipe to see all columns ↔
| Field | What to record | How to confirm |
|---|---|---|
| Apron geometry | Bib size, neck-anchor spacing and waist-tie position | Reference one dimensioned apron drawing |
| Use condition | Pocket contents, clothing layers and trial movements | Define representative loading and motions |
| Adjustment range | Shortest, middle and longest settings, with free-tail direction | Mark hardware position on fitted samples |
| Contact surface | Finished width, edge feel, reverse, printed or raised area | Inspect against skin and intended clothing |
| Anchor and adjuster | Fold, seam, fitting identity, threading path and layer count | Build both ends with production-intent parts |
| Care pairing | Apron fabric, strap shade, cleaning and drying sequence | Measure and inspect the sewn assembly before and after care |
Comfort and fit acceptance remain buyer-defined; tape softness does not compensate for an asymmetric load path.
Download specification worksheet ↓Move from a flat swatch to a worn approval
Map settings and load
Mark neck anchors, adjuster travel and pocket load on one apron drawing. Include the worn extremes rather than judging only a convenient middle setting.
Build the real contact path
Sew the proposed tape, folds and fitting to the intended bib and waist system. Preserve the production edge orientation and free-tail direction.
Observe wear and care
At each selected setting, check pressure, hair or collar contact, bib centring and access to adjustment, then repeat after the agreed cleaning sequence.
Freeze visible references
Retain a fitted photograph, marked dimensions, hardware sample and cared prototype so production can reproduce placement as well as the selected tape construction.
Shortcuts that hide the source of discomfort
Choosing by softness alone
A soft tape can still press on one edge when anchors are uneven. Correct bib geometry and load distribution before comparing surface feel.
Fitting an empty apron
Front-pocket weight changes strap angle and hardware position. Repeat the fit with buyer-defined contents and the clothing layers expected in use.
Washing separate swatches
Separate shrinkage readings miss seam puckering, colour transfer and adjuster movement. Apply the care process to a sewn apron and remeasure the worn path.
Questions before you choose
What webbing is comfortable for an apron neck strap?
Choose a soft, flexible tape with smooth edges and enough width to spread pressure without becoming bulky at the adjuster. Try the finished apron for the expected wearing time. Check skin or clothing contact, adjustment range and wet-cleaning behaviour.
How can an apron strap avoid shrinking differently from the apron body?
Wash the exact strap and apron fabric as a sewn prototype using the labelled care process. Measure neck length and body dimensions before and after, then inspect puckering and colour transfer. Approving separate swatches will not reveal interaction at the seam.
Tell us what you are making
You can enquire before every detail is settled. Tell us the intended use and what you need help choosing; add dimensions or quantities if you know them.
What happens after your enquiry
We review the intended use and open specification questions first. Sample options, costs, minimum quantities and timing can then be discussed against that brief. Sending an enquiry does not place an order.
Request a relevant sample →