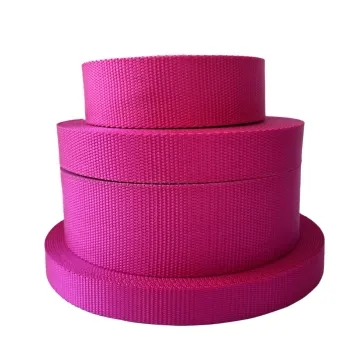
Webbing shrinkage after washing
Test webbing with the product's actual care cycle. Measure before and after, and inspect how the strap and adjacent fabric change relative to each other.
Content updated

In this guide
Key choices for your project
Mark the same measurement points before and after the agreed washing and drying process. Report length and width separately. Compare the tape on its own and sewn to the intended fabric, because a small difference between materials can cause visible puckering.
- Marked measurement points
- Separate length and width change
- Sewn sample after drying
The loose tape meets shrinkage limits, while the sewn panel puckers
Imagine a garment trim whose loose webbing changes little in washing. The adjacent fabric contracts differently and the long panel bows after drying. One laboratory measures it damp; another pulls it flat after overnight relaxation. Their percentages describe different states.
Define the wash, rinse, drying and relaxation cycle before cutting specimens. Mark length and width gauges, test matched loose strips and production-intent sewn panels, and record curling, twist, seam puckering and end offset without forcing samples flat. Compare materials at the same stated time after care.
Control the care state and measure both loose webbing and its sewn combination, because differential change can matter more than the tape percentage alone.
Mark direction and measure after relaxation
Place permanent gauge marks along and across the tape before washing, then use the agreed drying and relaxation period before remeasurement. Record curling or twist as well as dimensional change. Pulling the sample flat can conceal distortion that will remain visible in a sewn product.
- Lengthwise and widthwise gauge marks
- Curl and twist after relaxation
Check differential shrinkage in the seam
Sew the webbing to the production fabric at the intended stitch density before running the care cycle. Inspect puckering, seam bow and end alignment after drying. Even modest changes in two materials can accumulate in opposite directions and distort a long panel.
- Sewn panel after the care cycle
- Puckering and end misalignment
Create a wash-shrinkage record
Tie dimensions to one repeatable care and relaxation sequence.
Swipe to see all columns ↔
| Field | Record | Confirm |
|---|---|---|
| Care cycle | Wash program, load, detergent, water condition, rinse and count | Run stated complete sequence |
| Drying and relaxation | Drying route, temperature setting, orientation, rest time and atmosphere | Timestamp each transition |
| Specimen | Item, lot, direction, initial condition, cut length and quantity | Label outside gauge area |
| Gauge and measurement | Length/width marks, instrument, tension and calculation basis | Remeasure same points |
| Sewn comparison | Adjoining fabric, seam, stitch density, panel length and edge alignment | Use production-intent assembly |
| Acceptance evidence | Length and width change, curl, twist, puckering and end offset | Apply project-defined rule |
Care labels and acceptance limits are project inputs. State whether change is calculated from conditioned, relaxed dimensions and keep the sign convention clear.
Download specification worksheet ↓Measure dimensional change without hiding distortion
Freeze the care procedure
Agree washing, rinsing, drying, number of cycles and relaxation before testing. Record any machine or load requirement that affects repeatability.
Prepare matched controls and panels
Mark length and width gauges on identified loose strips and sew matched pieces to the intended fabric with the production seam.
Run care and relax consistently
Complete the full sequence without substituting drying routes. Lay specimens in the agreed orientation and wait the defined relaxation time.
Measure change and assembly effect
Remeasure the same marks without stretching flat. Record curl, twist, puckering and end mismatch and retain labeled before-and-after evidence.
Three shrinkage checks that conceal product distortion
Measure while the sample is still damp
Moisture and incomplete relaxation change dimensions. Use the defined drying and rest sequence and record the actual measurement time.
Pull curled tape flat to read it
Applied tension can hide deformation that remains in the product. Measure under the agreed low-tension state and report curl separately.
Test only a loose strip
Acceptable tape change can still mismatch the adjoining fabric. Test the intended seam and panel length to reveal differential shrinkage.
Questions before you choose
How should wash shrinkage be specified for webbing used on garments?
Use the garment’s actual wash and drying process, number of cycles and measurement direction. Report length and width change separately. Sew tape to the intended fabric as well as testing it loose, because differential shrinkage can cause puckering or curved seams.
Is the first wash enough to approve webbing shrinkage?
Only if the product’s care requirement stops there. Some constructions change further over repeated cycles or during tumble drying. Agree the required cycle count, conditioning before measurement and appearance criteria, then examine twisting, edge waviness and colour transfer alongside dimensions.
Products to start with
Open a product to see its listed specification. Custom colours, dimensions and order terms are confirmed for your project.

More product photos
Tell us what you are making
You can enquire before every detail is settled. Tell us the intended use and what you need help choosing; add dimensions or quantities if you know them.
What happens after your enquiry
We review the intended use and open specification questions first. Sample options, costs, minimum quantities and timing can then be discussed against that brief. Sending an enquiry does not place an order.
Request a relevant sample →